Network Discovery
Go to Administration -> i-Vertix -> Plugin Store and install the required Network plugins
Configure a new job
To add a new Discovery Job:
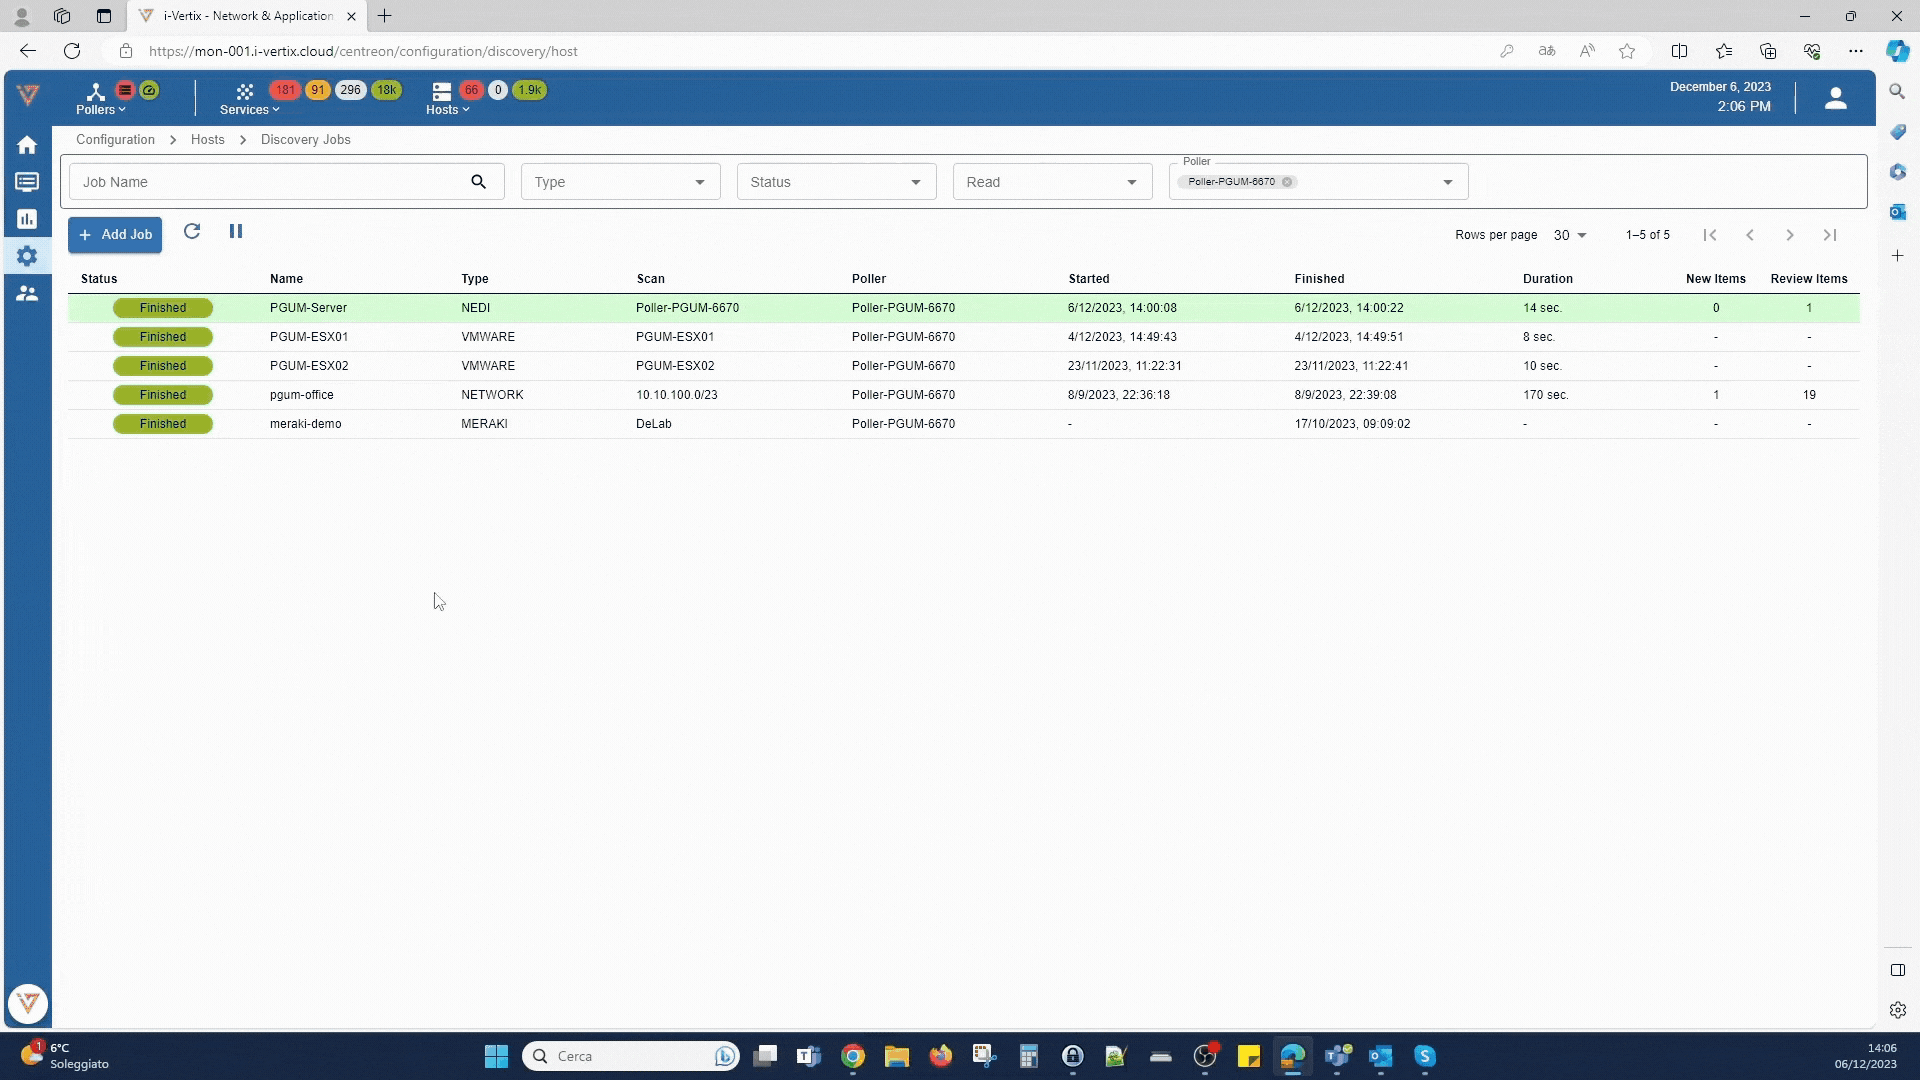
Go to Configuration -> Hosts -> Discovery Jobs
- click on +ADD JOB
- select Network Topology
Job settings
- Job Name: use a meaningful name
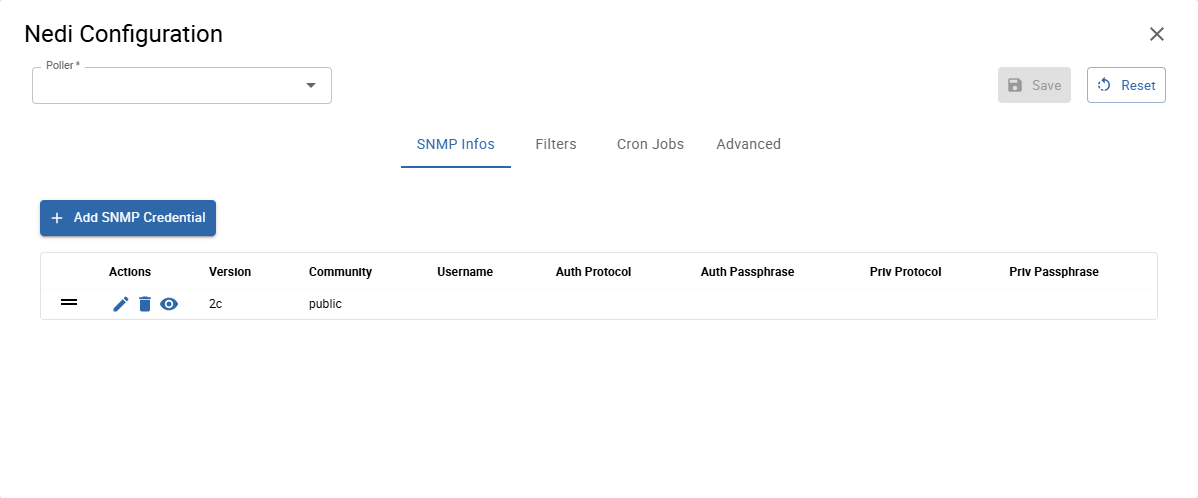
- Nedi Configuration: select a configuration from the drop-down menu otherwise click on + ADD CONFIGURATION to create a new one
- Poller: select the Smart Poller that will run the scan
- SNMP info: click on + ADD SNMP INFO to enter the SNMP communities
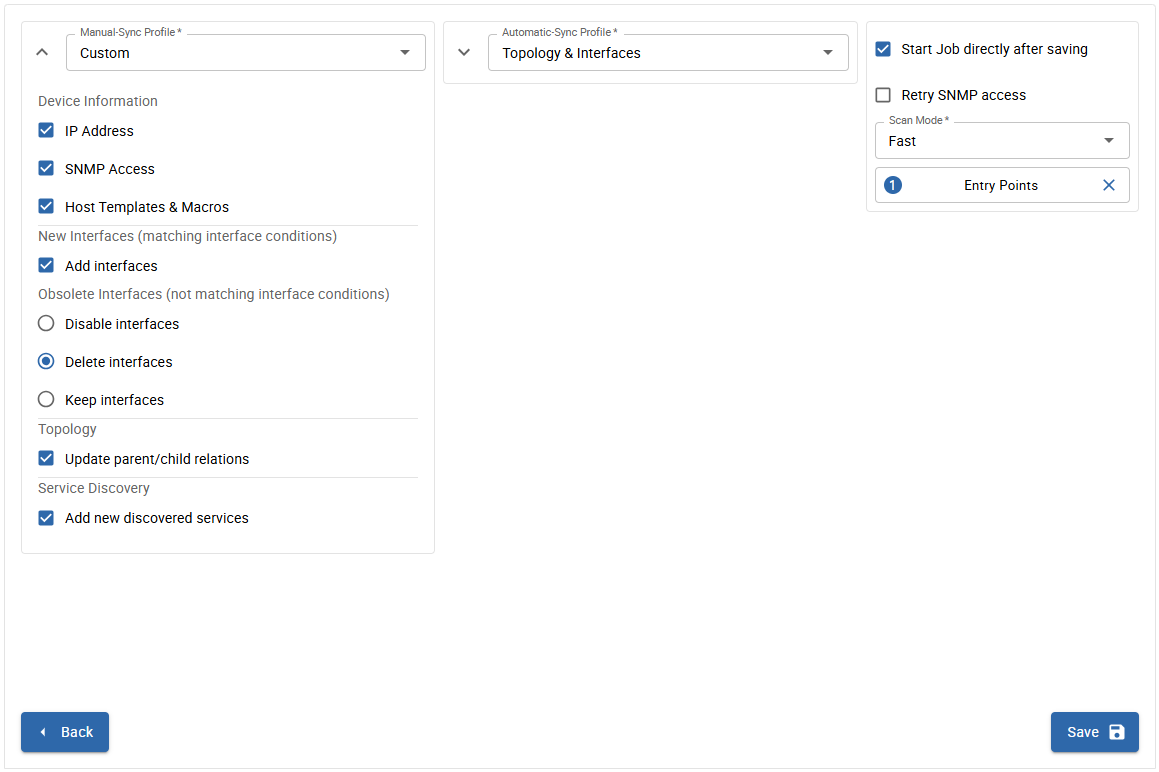
Template Rules
Mapping rules are preconfigured by i-Vertix
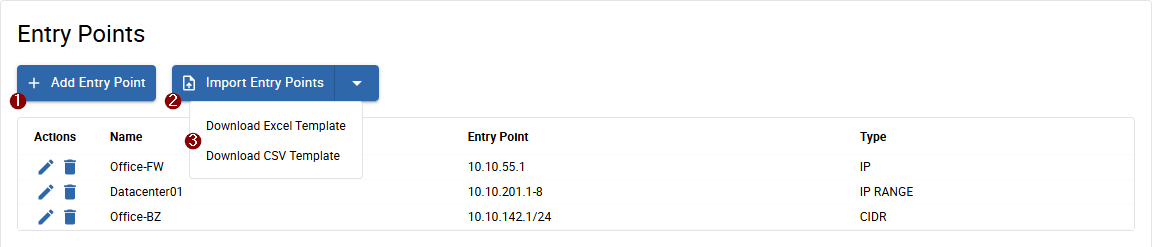
Entry Points
Enter IP Address or IP Address range from which the discovery will have to start
Finalize
Select Start Job directly after saving to run the scan as soon as it gets saved. Select the Entry Point added previously. Click on Save to save the discovery job.
The job will be run according to the configured schedule.
Results
Once the scan completes, its results are displayed.
They depend on the devices reachability, template rules mapping, SNMP reachability and status filters that have been applied (Note: “new” and “existing (ip)” are applied by default).

LIST tab displays the network devices that were detected by the discovery
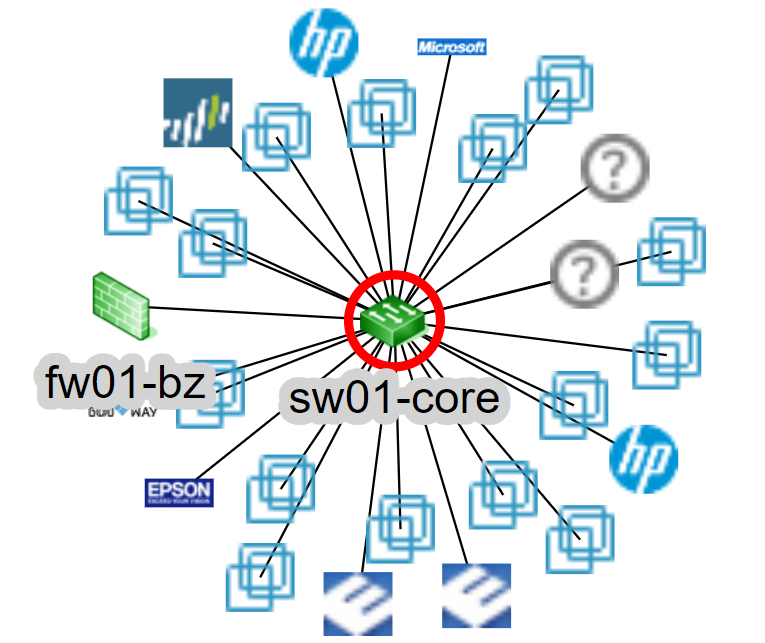
Map tab
This tab displays the network infrastructure topology map: how network devices are interconnected to each other and the root device(s) (RELATION ROOT(S)).
To assign root role to a device, click on it and then select RELATION ROOT. A red circular border will appear. Multiple relation roots can be defined. You can replace the current one or add new ones.
How to monitor Hosts
Select the hosts you want to monitor and click on SYNC WITH MONITORING.
As previously stated, any changes will take effect only once they are exported to the Smart Poller(s).
See the complete procedure for Network Topology Discovery