How to attach a Smart Poller to the Central Management
Add the new Poller
To attach a Smart Poller i-Vertix4 to a Central Management, please follow these instructions:
-
Go to ConfigurationPollers

-
Click on
Add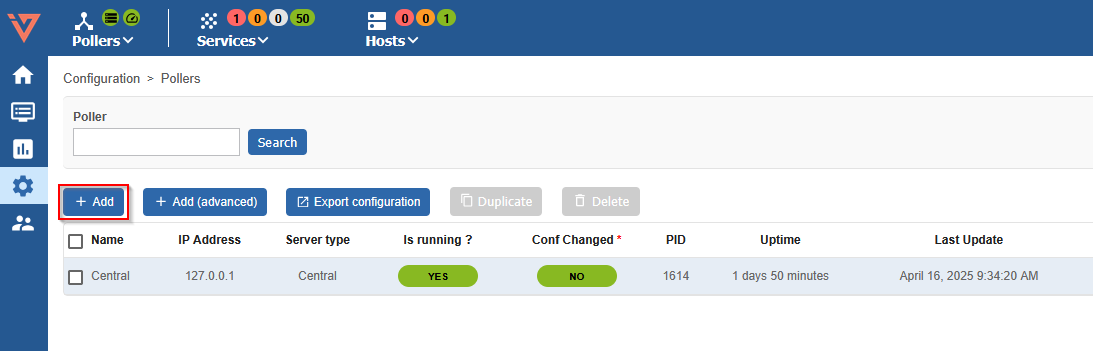
-
Select Add a Centreon Poller and then
Next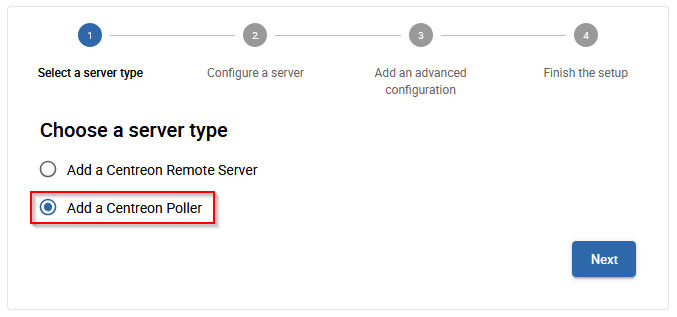
-
Fill in the Poller information
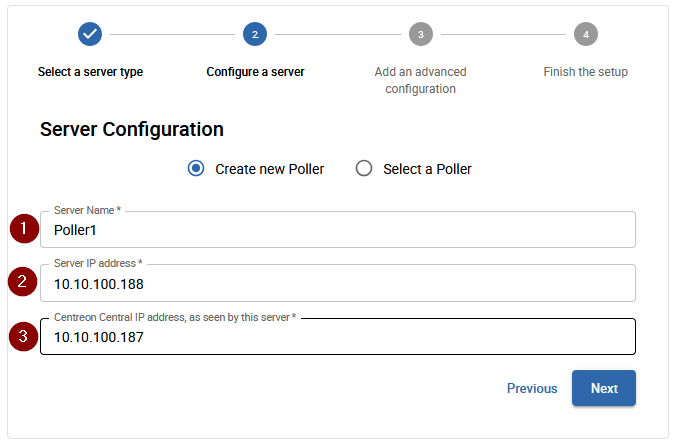
- 1 The new Poller name
- 2 The new Poller IP address
- 3 The i-Vertix Central IP address, please make sure the Poller is able to contact the Central with this IP address
-
Click on
Applyto Add the new Poller and return to the Poller List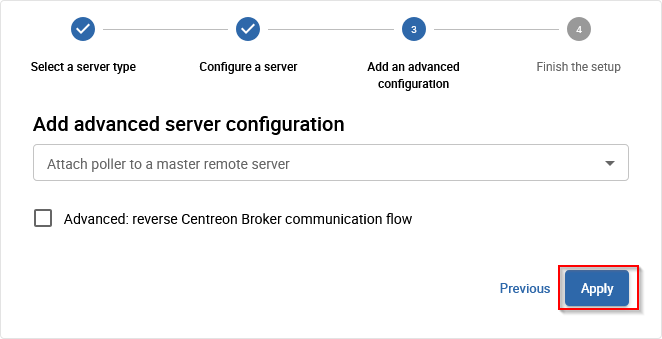
When the Smart Poller is unable to directly contact the Central Server, due to specific network settings for example, it is possible to configure the Central to initiate the connection to the Poller's Broker instead.
In this case the Advanced: reverse Centreon Broker communication flow option should be enabled.
This option will automatically create a matching Input entry in the central-broker-master Broker configuration for the Central.
For more information refer the Additional configuration section.
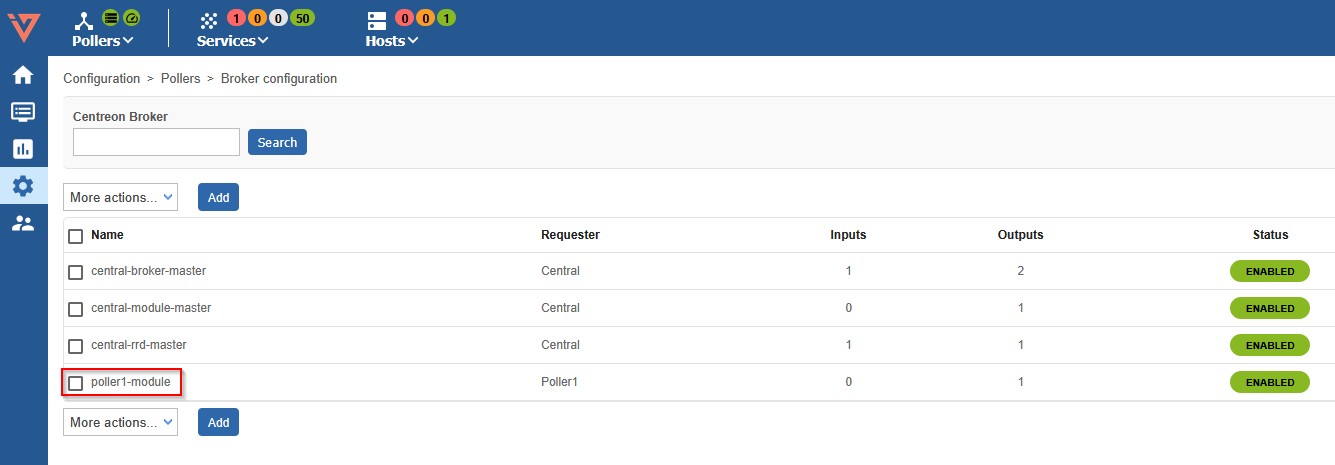
Broker configuration
-
go to Configuration -> Pollers -> Broker configuration
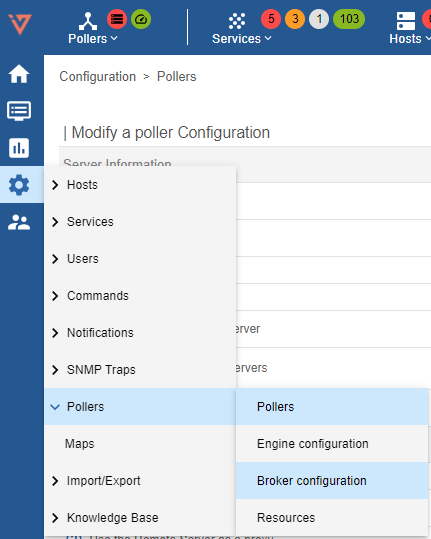
-
Click on the entry created for the new Poller, in this example poller1-module
-
Set the field "Event queue max size" to 250000
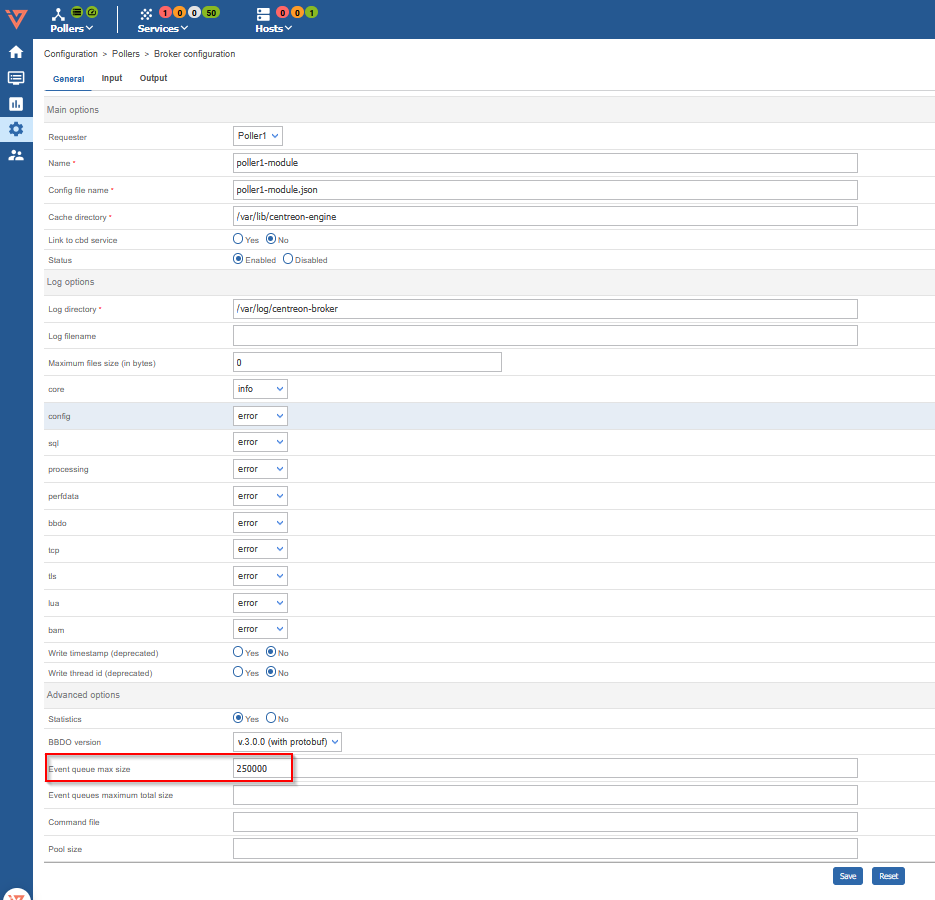
-
Save this configuration by clicking
Saveat the top right corner
Poller resources configuration
-
go to Configuration -> Pollers -> Resources
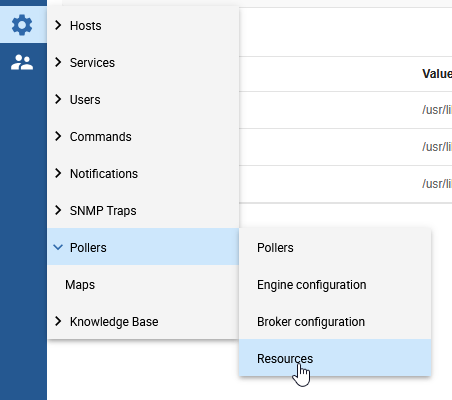
-
Click on the $IVERTIXPLUGINS$ entry

-
Add the poller to the Linked Instances field.
This setting is needed to configure the base directory for the commands on the Poller

-
Save this configuration by clicking
Saveat the top right corner
Gorgone configuration deploy
-
logon on your i-Vertix Central GUI and go to Configuration -> Pollers
-
click on the ICON “Gorgone configuration” under Actions
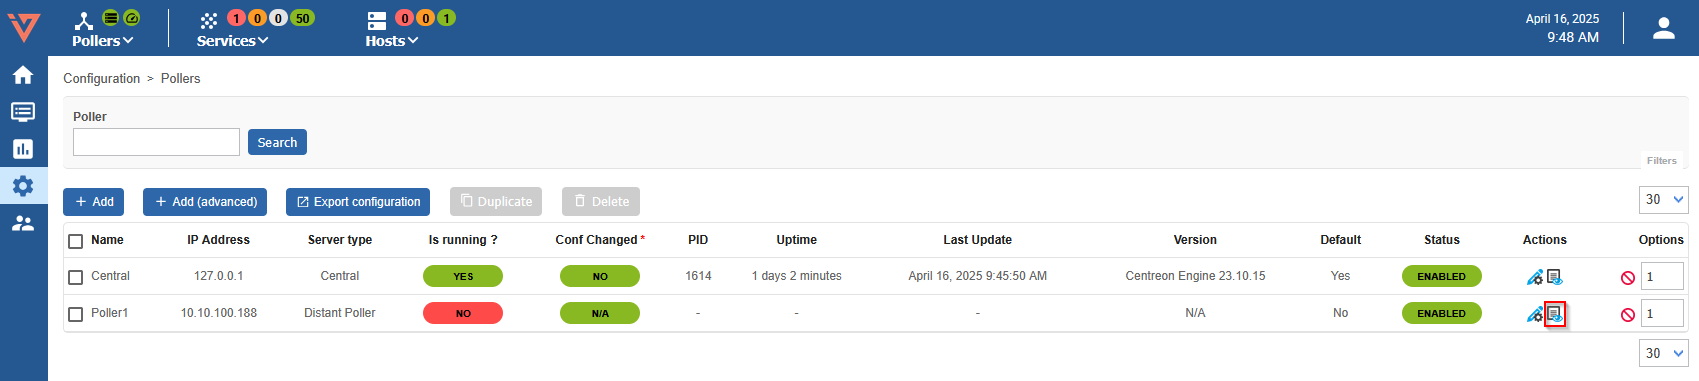
-
following page should appear
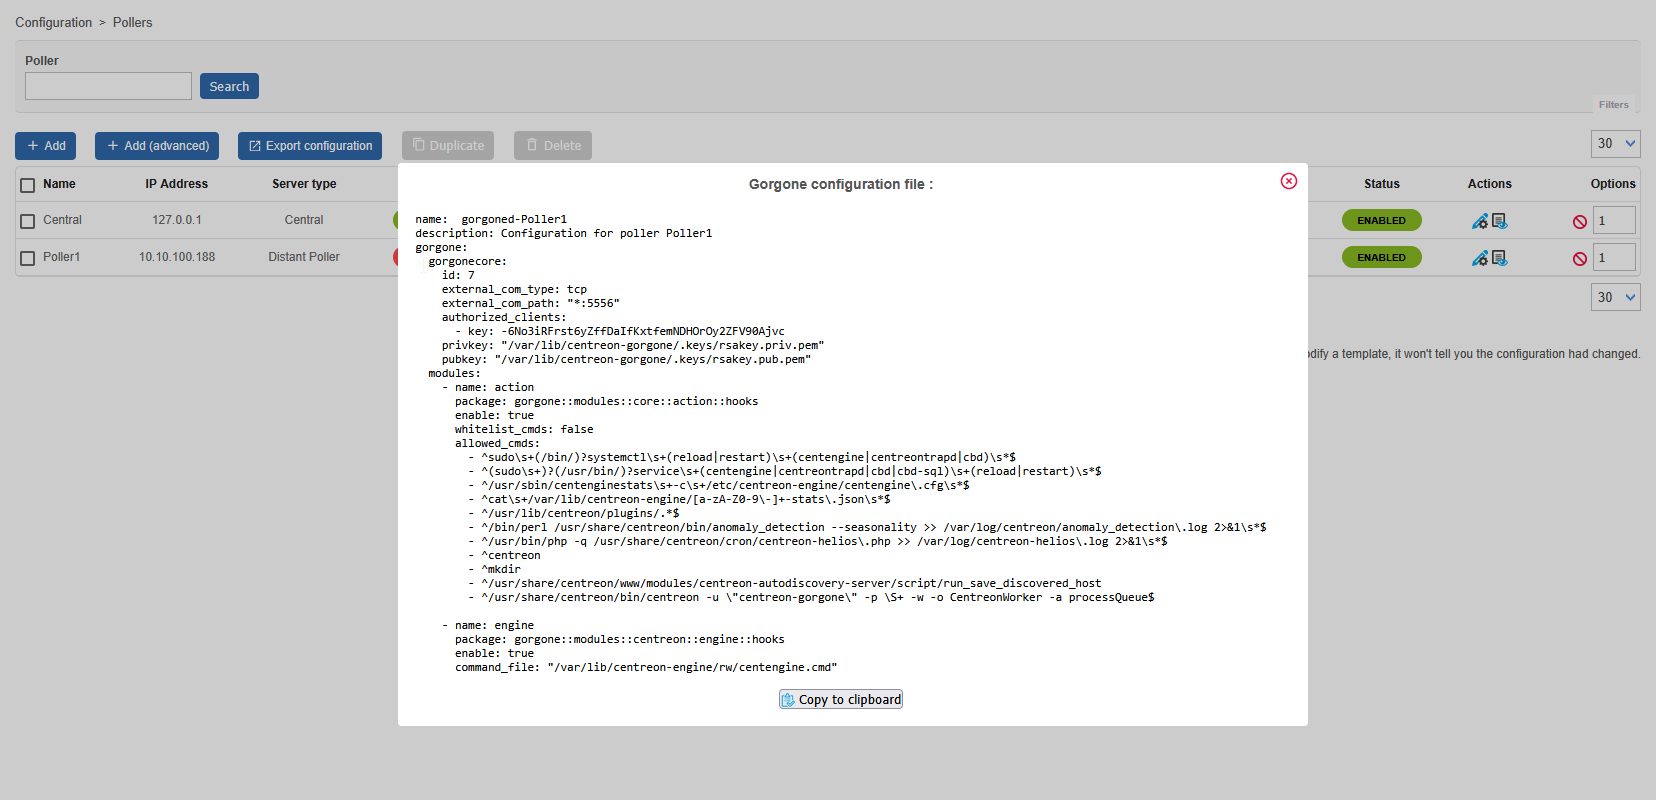
-
click
Copy to clipboard -
Log on to the i-Vertix4 Poller through SSH.
After login, run:
sudo bashto become root
-
Paste the previously copied text in the terminal and submit, to create the new configuration file for the gorgone daemon
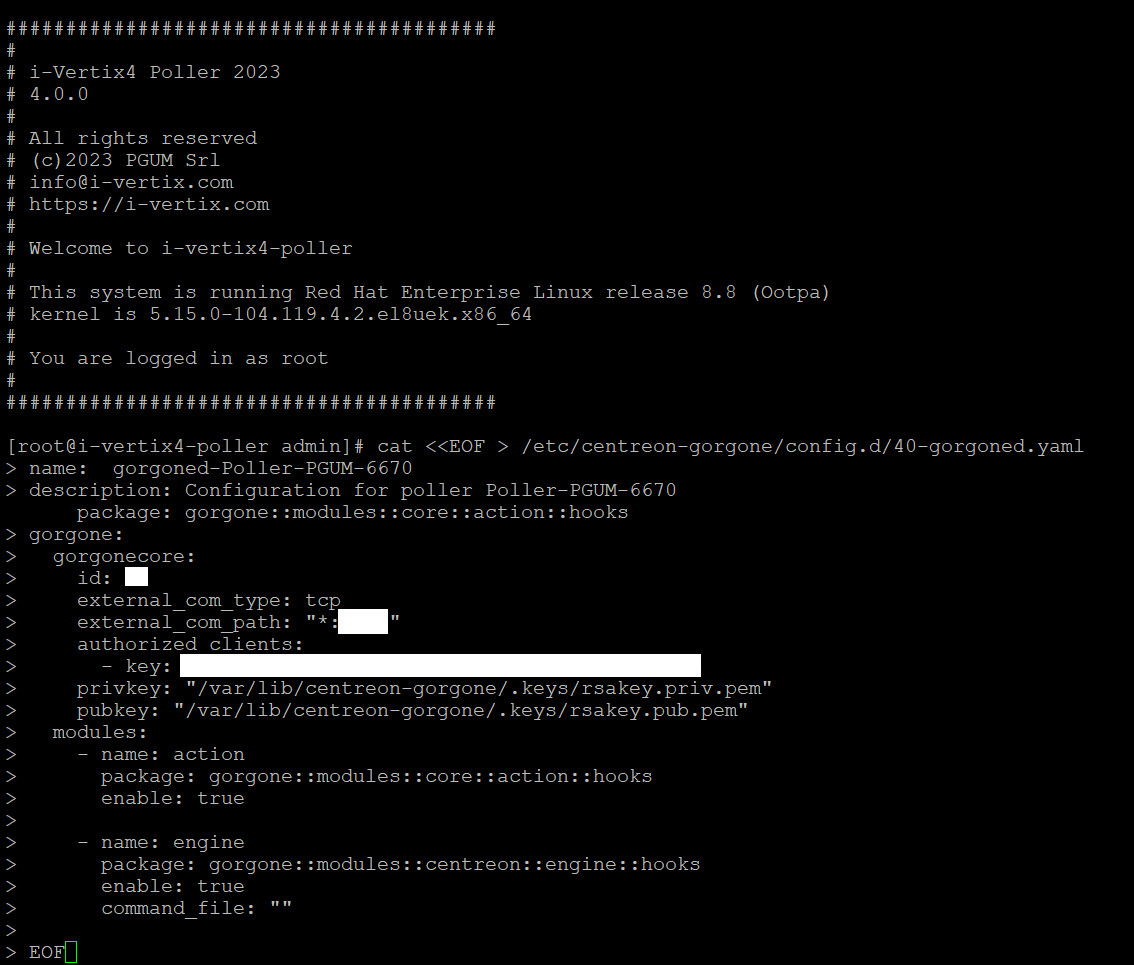
-
Restart the gorgone daemon on your Poller to use the new configuration
systemctl restart gorgoned.service
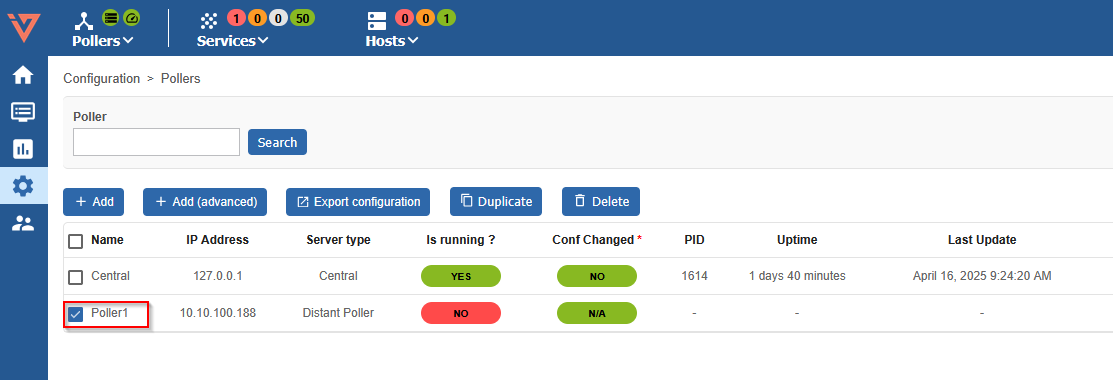
Poller Configuration Export
-
Go to Configuration -> Pollers -> Pollers
-
Select the Smart Poller that is being configured
-
Click on Export configuration

-
Select the first 4 options (at left) , then select Method -> Restart in the drop down menu
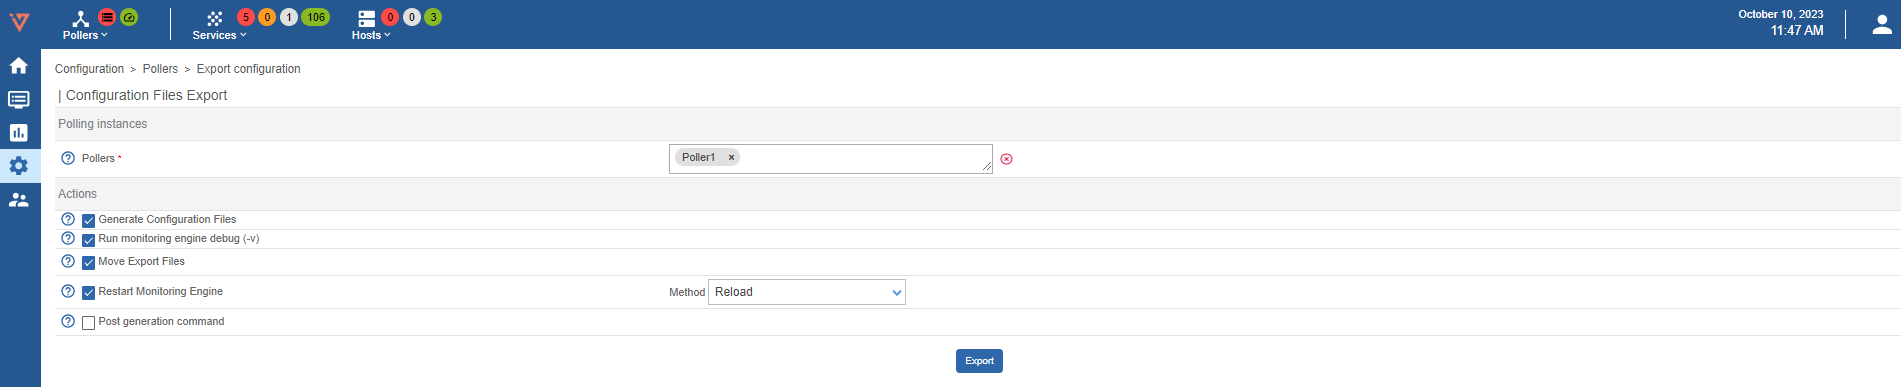
The following steps are mandatory to synchronize immediately the plugins with the new Poller and start monitoring right away. Otherwise, the Central Manager performs the synchronization every 4 hours
-
Launch the following command to synchronize the plugins with the Poller and start immediately the monitoring.
sudo /opt/i-vertix/scripts/i-vertix/sync_poller.sh -
Final check in the GUI under Configuration -> Pollers -> Pollers
Check if the configuration is like the one shown in the picture.

At this stage of the setup, the Poller is fully configured and ready to begin monitoring. The following section covers advanced configuration options that may be useful for specific use cases.
Additional configuration
Reverse Broker communication flow
In certain cases, the Poller might not be able to initialize the broker data flow to the Central or Remote Server—such as when a firewall blocks the connection. To work around this limitation, it is possible to configure the Central Server to initiate the connection to the Poller's Broker instead, effectively circumventing the issue.
If the Poller was added with the option Advanced: reverse Centreon Broker communication flow everything is already set up, and the following steps are needed only to change the configuration.
Otherwise the following steps are needed:
-
Go to the Configuration > Pollers > Broker configuration menu and click on central-broker-master configuration on the Central Server.
-
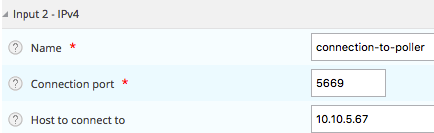
Go to the Input tab panel and add a new TCP - IPv4 entry.
-
Enter the Name of the connection, the TCP Connection port where the Poller is listening, and the Host to connect to (IP address of the Poller). Then Save your configuration.
Communication Protocol between Central Manager and Smart Poller
The Gorgone daemon, installed on the Pollers, typically communicates with the Central server using a ZeroMQ (ZMQ) based messaging protocol. The messaging protocol is also leveraged by the Broker daemon to send the metrics from the Poller to the Central.
However, it is still possible to configure the Pollers to use the legacy SSH-based communication method. While SSH communication remains available, it is deprecated and no longer actively developed. Its only purpose is as a transitional option for migrating from older platforms that previously relied on Centcore, therefore it will not be covered in this guide.
Pollers that will not use ZMQ as communication type between Central's Gorgone and theirs will not benefit from all i-Vertix and i-Vertix's extensions features.
The SSH connection, despite its deprecation as a messaging protocol, is still used as the primary channel for several important features:
- Network Configuration Backup
- plugins synchronization
- configuration and debug
A comprehensive description of all the communication happening between the Central and the Pollers can be found at Table of network flows.