Setup Central and Pollers
After you have made sure that your organization fulfills the requirements you can now start with the setup of your i-Vertix Monitoring solution. This guide only describes the minimum steps to install and configure the system. For a more detailed installation, check the complete Installtion Guide.
The following steps assume you already know which architecture you are about to install and how much resources you need for each virtual appliance as listed in the requirements.
Import the Central Management System
Our sales team should have sent you a .ova file (or similar) for the Central Manager system to download. Once the file has been downloaded, import the appliance into your hypervisor and assign the calculated hardware resources to the new virtual machine.
Check our import a virtual appliance guide if you are not 100% sure how to import the appliance correctly.
After the ova file is successfully imported, start the new virtual machine.
Login
Open the console of the new virtual machine to perform the most important tasks.
Use following default credentials for the first login:
-
User:
admin -
Password:
changeme(change as soon as possible)
After you have successfully logged in the i-Vertix Central menu should appear:
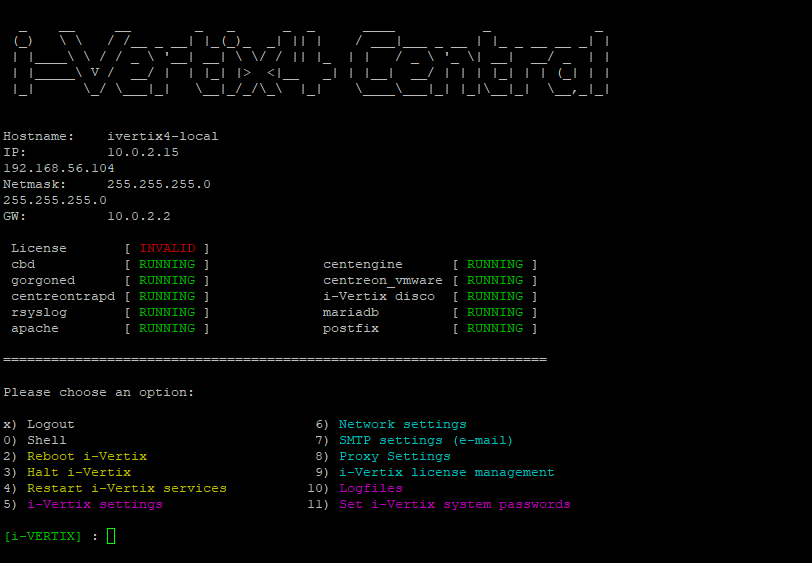
If the menu does not appear, you can always reopen it using following command:
menu
Change default password
First things first: change the insecure default password to a new, secure password of your choice by selecting option 11) Set i-Vertix system passwords from the menu.
Network configuration
Enter option 6) Network settings from the menu to enter the system network configuration.
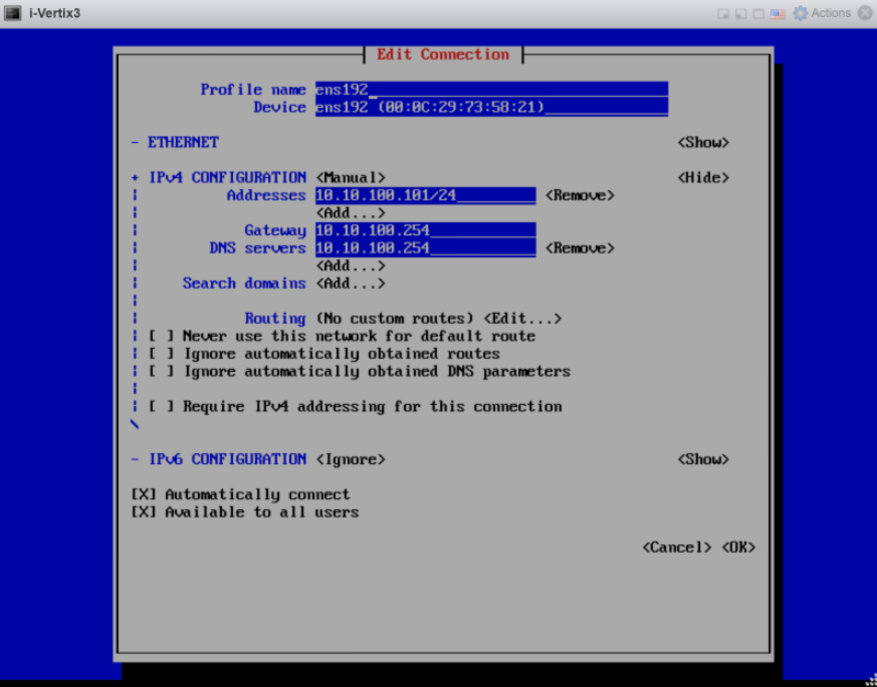
Most importantly you need to assign an IP address to the new virtual machine along with internet access. Our Network configuration article explains how to use the network manager (nmtui).
Internet access is needed to complete the initial system setup. In case no internet access is available, please ask our support team for a detailed offline procedure.
It may be necessary to restart the virtual machine after completing the network settings configuration.
After the network is configured you can also open a console connection via SSH to this virtual machine on port 22.
Change timezone
By default the timezone Europe/Rome is configured. You can change the timezone by selecting option 5) i-Vertix settings -> 2) change timezone from the menu.
The provided timezone must be an official timezone identifier.
After changing the timezone, realod the system time by selecting option 5) i-Vertix settings -> 1) NTP time settings from the menu.
License activation
Open the license management by selecting option 9) i-Vertix license management.
Send the displayed UUID to our support team. Shortly after you will receive a notification that your license is ready and can be downloaded.
You can download the new license always from the license management using option 3) Download license key informations.
To fully activate your system after activating the license please restart the system.
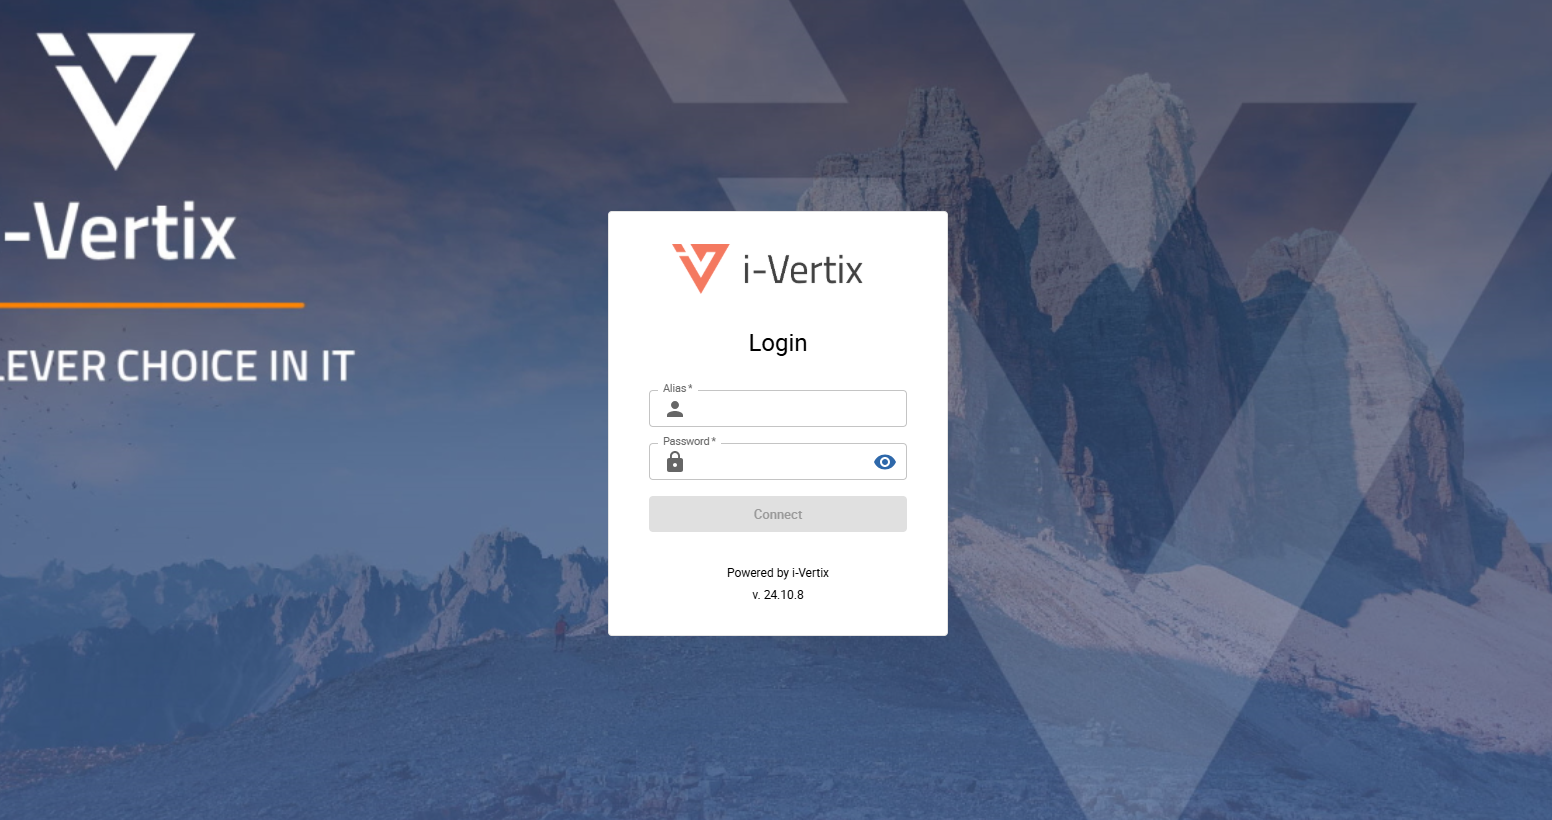
Access to Web console
Open any browser and enter the host address of the Central Manager. A login form should appear to which you can insert following default credentials to log in as admin:
- Username:
admin - Password:
ChangeMe$2024
After you have successfully logged in, immediately change your password:
- Click the user icon in the top right corner of the page and select
Edit Profile
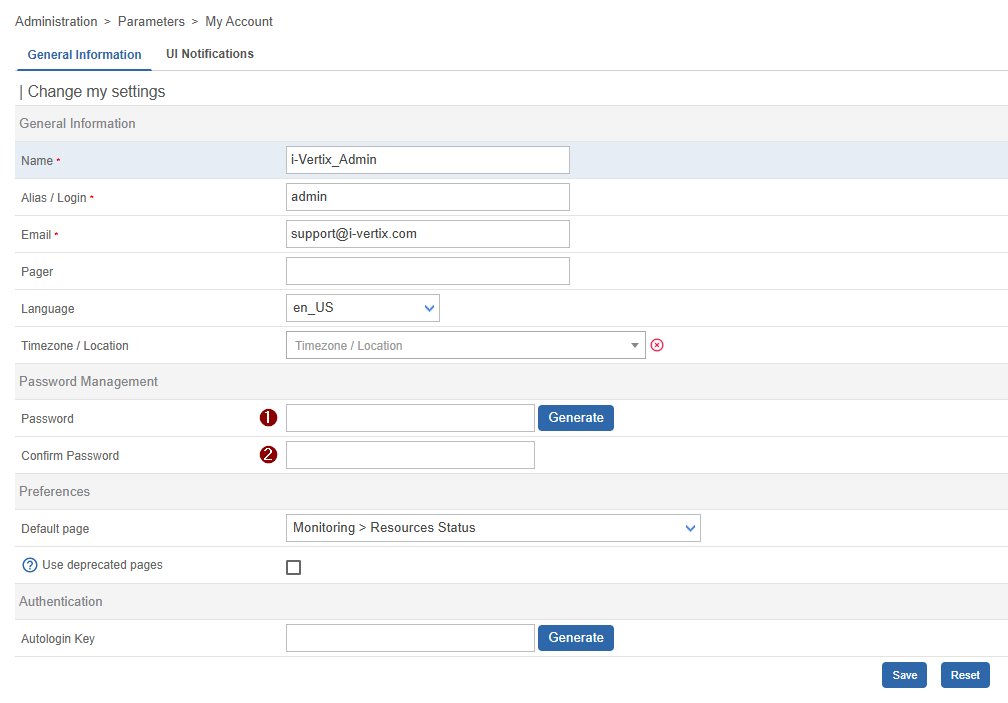
- Insert a new 1 strong password
- Retype your new 2 strong password
- Save the form
You can now proceed with the Plugin Store Configuration in case you don't have to set up i-Vertix Pollers or if you want to do that later.
Import the Poller appliance
Repeat the following steps for every poller you need to install
Our sales team should have sent you a .ova file (or similar) for the i-Vertix Poller system to download. Once the file has been downloaded, import the appliance into your hypervisor and assign the calculated hardware resources to the new virtual machine.
Check our import a virtual appliance guide if you are not 100% sure how to import the appliance correctly.
After the ova file is successfully imported, start the new virtual machine.
Login
Open the console of the new virtual machine to perform the most important tasks.
Use following default credentials for the first login:
-
User:
admin -
Password:
changeme(change as soon as possible)
After you have successfully logged in the i-Vertix Central menu should appear:
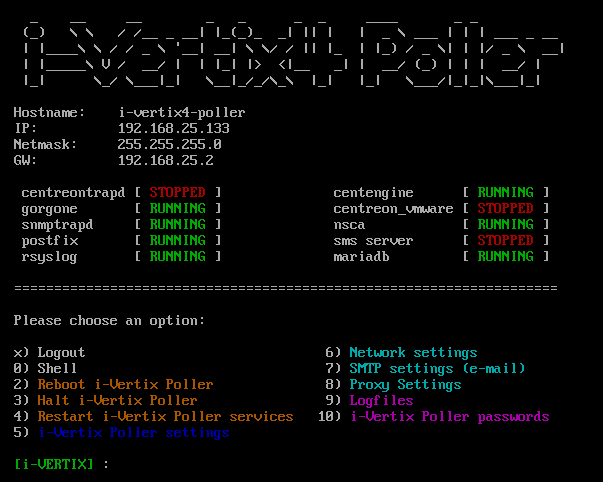
If the menu does not appear, you can always reopen it using following command:
menu
Change default password
First things first: change the insecure default password to a new, secure password of your choice by selecting option 10) i-Vertix Poller passwords from the menu.
Network configuration
Enter option 6) Network settings from the menu to enter the system network configuration.
Most importantly you need to assign an IP address to the new virtual machine along with internet access. Our Network configuration article explains how to use the network manager (nmtui).
Internet access is needed to complete the initial system setup. In case no internet access is available, please ask our support team for a detailed offline procedure.
It may be necessary to restart the virtual machine after completing the network settings configuration.
After the network is configured you can also open a console connection via SSH to this virtual machine on port 22.
Change timezone
By default the timezone Europe/Rome is configured. You can change the timezone by selecting option 5) i-Vertix Poller settings -> 2) change timezone from the menu.
The provided timezone must be an official timezone identifier.
After changing the timezone, realod the system time by selecting option 5) i-Vertix Poller settings -> 1) NTP time settings from the menu.
Connect Pollers to the Central Management
This step requires the finished setup of the Central Management System.
Please read and run through the complete Attach a Poller to the Central Management process to add the new pollers to your monitoring system.