Network Configuration
warning
Before you start, please be careful to meet the technical requirement (see Technical Information)
Before proceeding to modify the network, be sure to operate from the hypervisor console to avoid loss of connectivity.
- Select option
6) Network settingsfrom the menu - Select Edit Connection
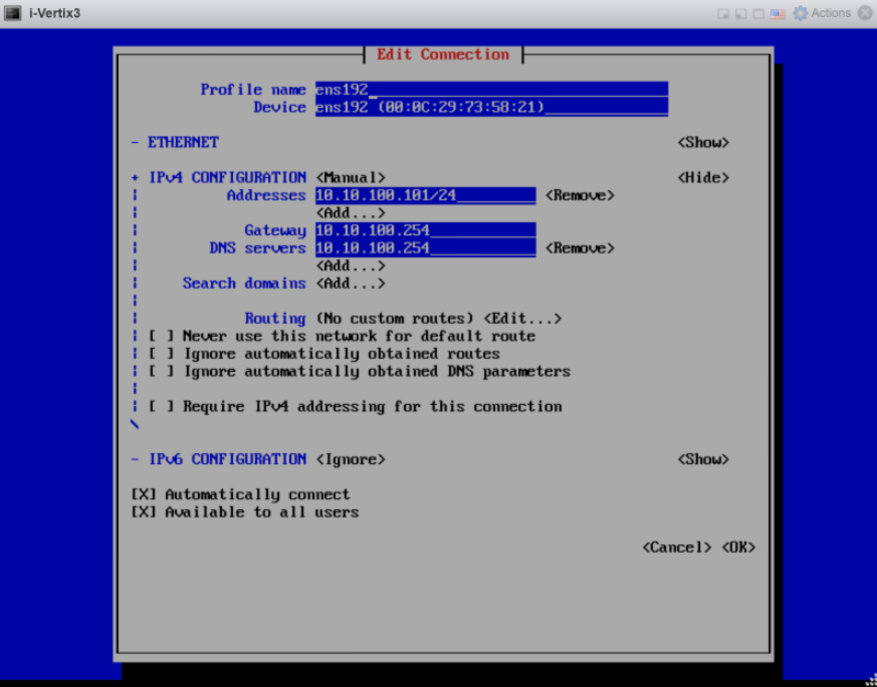
- Select the proper NIC (for example ens192) and then Modify followed by your network settings:
- IPv4 Configuration: Manual
- Addresses: IP address you want to assign to the Central Manager
- Gateway: your default gateway IP address
- DNS server: your DNS Server IP Address
- Search domain: Insert the domain (if necessary)
- IPv6 Configuration: Ignore
Confirm the settings with OK
Get back to main menu NMTUI (on the left-hand side)
- To activate the new settings, select Activate a connection from the NMTUI menu
- Select the NIC (ens192 by default ), then
- Deactivate
- Activate
- Finally select Back
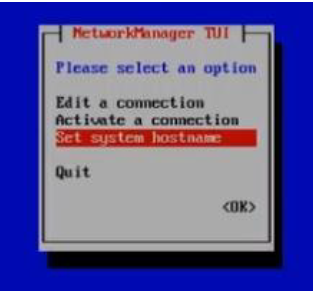
Get back to the main NMTUI menu
- Select Set a system hostname to configure the system hostname then select OK
- Select Quit to quit the NMTUI menu and get back to the i-Vertix menu
Now the network configuration is complete. Restart the system if necessary. Afterwards the system should be accessible via a network connection (for example using Putty).
note
Check that DNS is working
nslookup www.google.com
You should see following or a similar result:
nslookup www.google.com
Server:         192.168.25.2
Address:        192.168.25.2#53

Non-authoritative answer:
Name:   www.google.com
Address: 142.251.209.4
Name:   www.google.com
Address: 2a00:1450:4002:402::2004