Add a new map
Create a new graphical or geographical map
To create a new map, navigate to Configuration -> Maps.
The presented list shows all available maps. To add a new map, click the Add button above the list.
A new windows opens, where you need to define the map's name, type and access configuration. You can also define the default configuration for your map objects, which all map objects will inherit.
You can always overwrite single settings for every map object (icon, line, gadget, nested map) manually.
General
- Map Name: enter a meaningful name
- Type
- Graphical (normal)
- Geographical
When selecting type "Normal", the created map is like a static image where you can place hosts, services, groups, gadgets and nested maps.
- Background
By default, the background is an all-white 1920x1080px image.
You can also upload a custom background image (.png or .jpg).
The map automatically zooms and scales the background to fit the display size, but high-resolution images are still recommended.
- Use background as Thumbnail: automatically generates a thumbnail using your customized map background
When selecting type "Geographical", an interactive worldmap is created where you can place hosts, services, groups and nested maps.
- Thumbnail: upload a custom thumbnail to better distinguish the map in the map-overview
- Enable object popups: clicking on an object will bring up a popup that displays multiple details about the object. These details can be configured in "Popup Information" and can be changed later for each individual object.
- Enable Labels: display labels for placed objects
- Always enable map adjustment: upon closing popups, the map will automatically re-adjust. When this option is disabled by default, you can still re-align the map automatically when clicking the button on the top left corner of the map view
- Show Alerts: highlight objects, whose status changes to warning, critical, or unknown
- Status: enables or disables the map
ACL
- Access groups: Define access groups which are granted access to the map - only users assigned to a selected access groups will be able to access the map
Defaults
On this section you can define default settings for object labels and icon and line objects.
- Default Icons Options
- Default Line Options
- Default Label Options
Every default settings can be overwritten manually on single map objects.
Gadget Defaults
On this section you can define default settings for gauge, graph, text and map gadgets.
- Default Gauge-Gadget Options
- Default Graph-Gadget Options
- Default Text-Gadget Options
- Default i-Vertix Map-Gadget Options
Every default settings can be overwritten manually on single map objects.
Popup Information
On this section you can define which information is displayed by default on popups when clicking on objects (when not disabled).
- Only for Hosts and services
the provided information is only visible on host and service resources
- Only for Hosts
the provided information is only visible on host resources
- Only for Services
the provided information is only visible on service resources
- Only for Maps
the provided information is only visible on nested-map resources
- Only for Hosts, Service Groups, Host Groups and Maps
show a summary of contained/dependant resources - only for hosts, service groups, host groups and nested maps
- Only for Host Groups, Service Groups and Maps
show a detailed summary of contained/dependant resources - only for host groups, service groups and nested maps
To save your map, click the Save button on the top right.
To visualize and start placing objects on your map, navigate to Monitoring -> Maps -> Maps.
We also have a guidance, on how to place objects on your map: Place and modify objects on a map
Create a new topology map
To create a new topology map, navigate to Monitoring -> Maps -> Topology Maps and click the 1 + button next to the map-select.
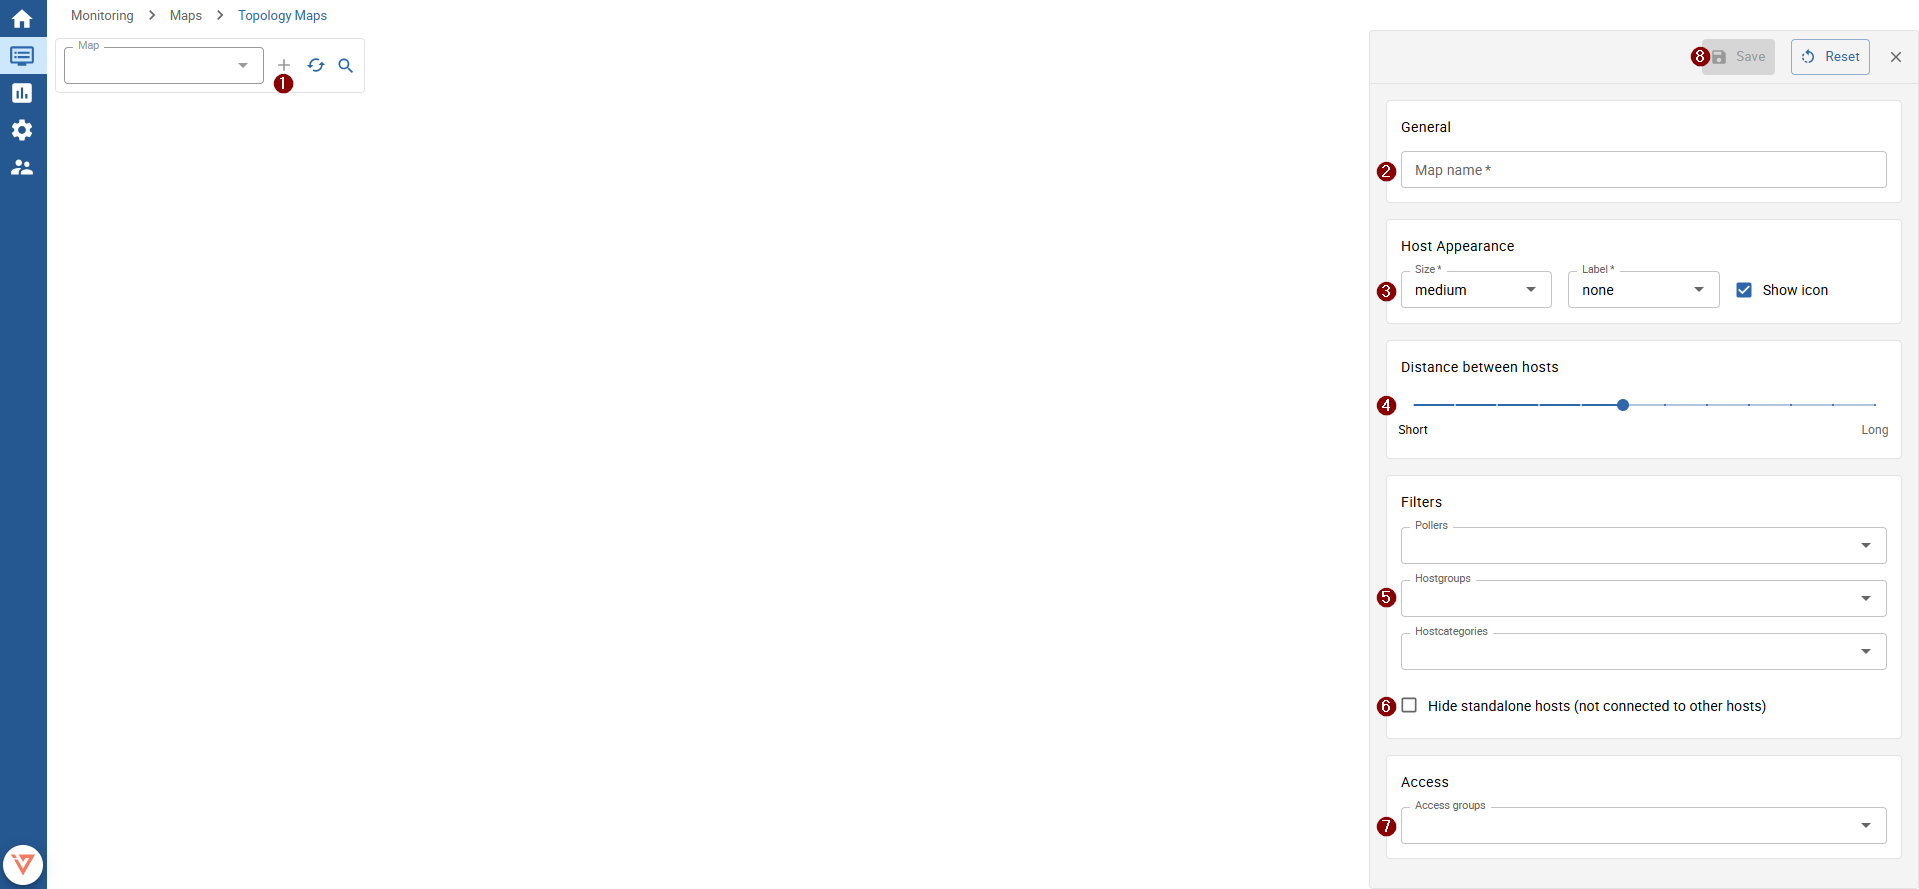
2 General
- Map name: enter a descriptive map name
3 Host Appearance
- Size: define the size of displayed device nodes
- Label: choose the label for displayed device nodes (none, host name, alias, address)
- Show Icon: when enabled, the host icon is used to visualize the device on the map
4 Distance between hosts
It is recommended to change this value after you have seen the map once.
Change this setting when some nodes are not clearly visible because they overlap (distance too near) or if you think the nodes are too far away (distance too long).
Moving the slider to the left decreases the distance between different map nodes. Moving it to the right increases the distance.
5 Filters
-
Pollers: filter hosts by monitoring pollers - only hosts monitored by the selected pollers are shown on the map
-
Hostgroups: filter hosts by hostgroups - only hosts assigned to selected hostgroups are shown on the map
-
Hostcategories: filter hosts by host categories - only hosts assigned to selected host categories are shown on the map
-
6 Hide standalone hosts: hide hosts which are not related to any other host on the map (visible as single floating devices, often located on the outer edge of the map)
7 Access
- Access groups: define who has access to the topology map - you need to specify at least one access group
Now you can save your new topology map by clicking the 8 Save button.
Other actions
After the map is successfully saved, it is automatically displayed.
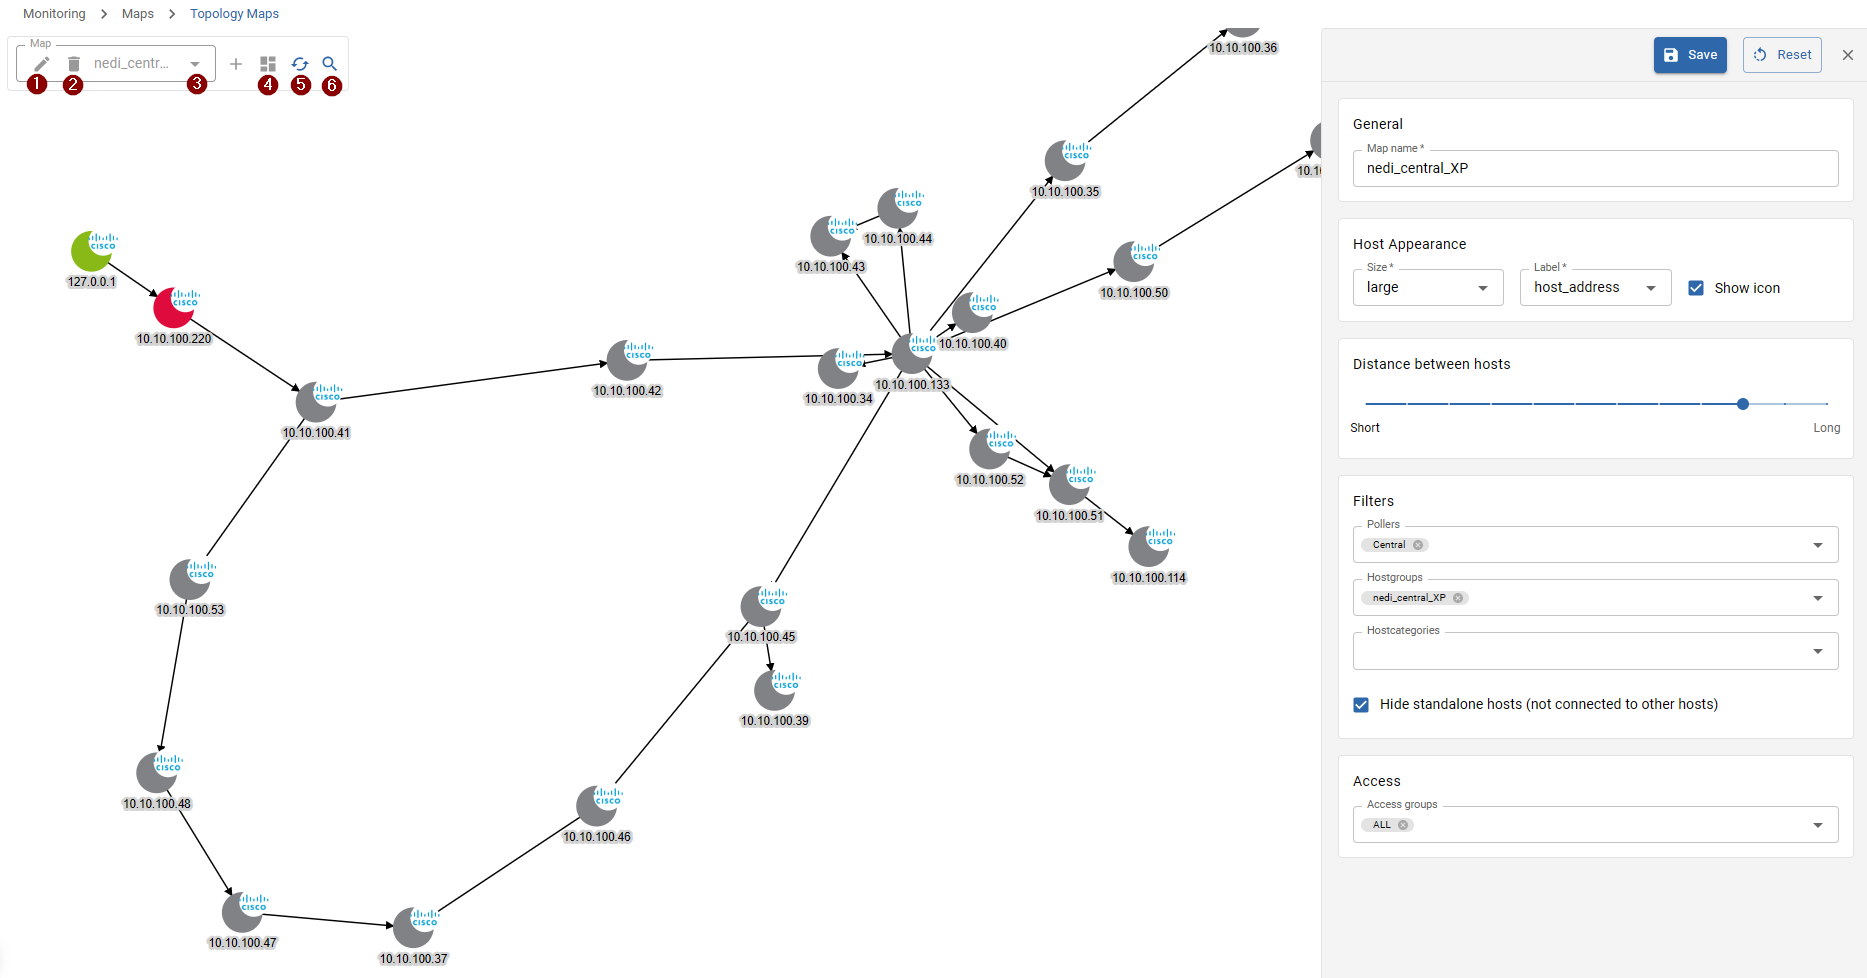
To edit the map again, click the 1 Edit button.
If you'd like to delete the currently opened map, click the 2 Delete button.
To view a different map, choose the map from the 3 select control.
It is also possible to:
-
4 Create a widget of the topology map
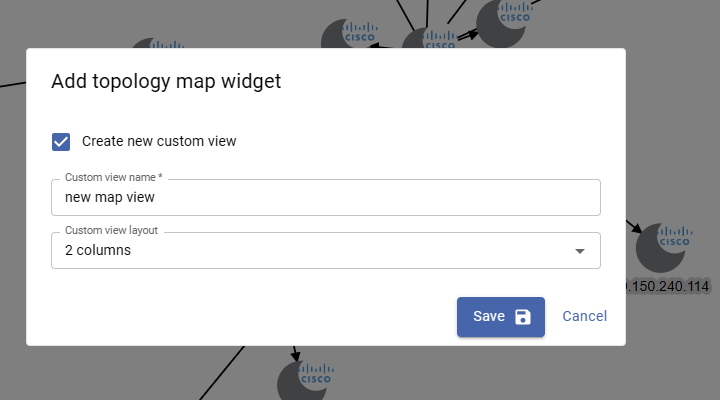
Select an already existing custom view or create a new one by providing a view name and the layout. After clicking save, the widget is appended to the existing/new view.
-
5 Manually refresh the map
-
6 Search hosts on the map (the map automatically zooms on to the selected host)