Configuring notification
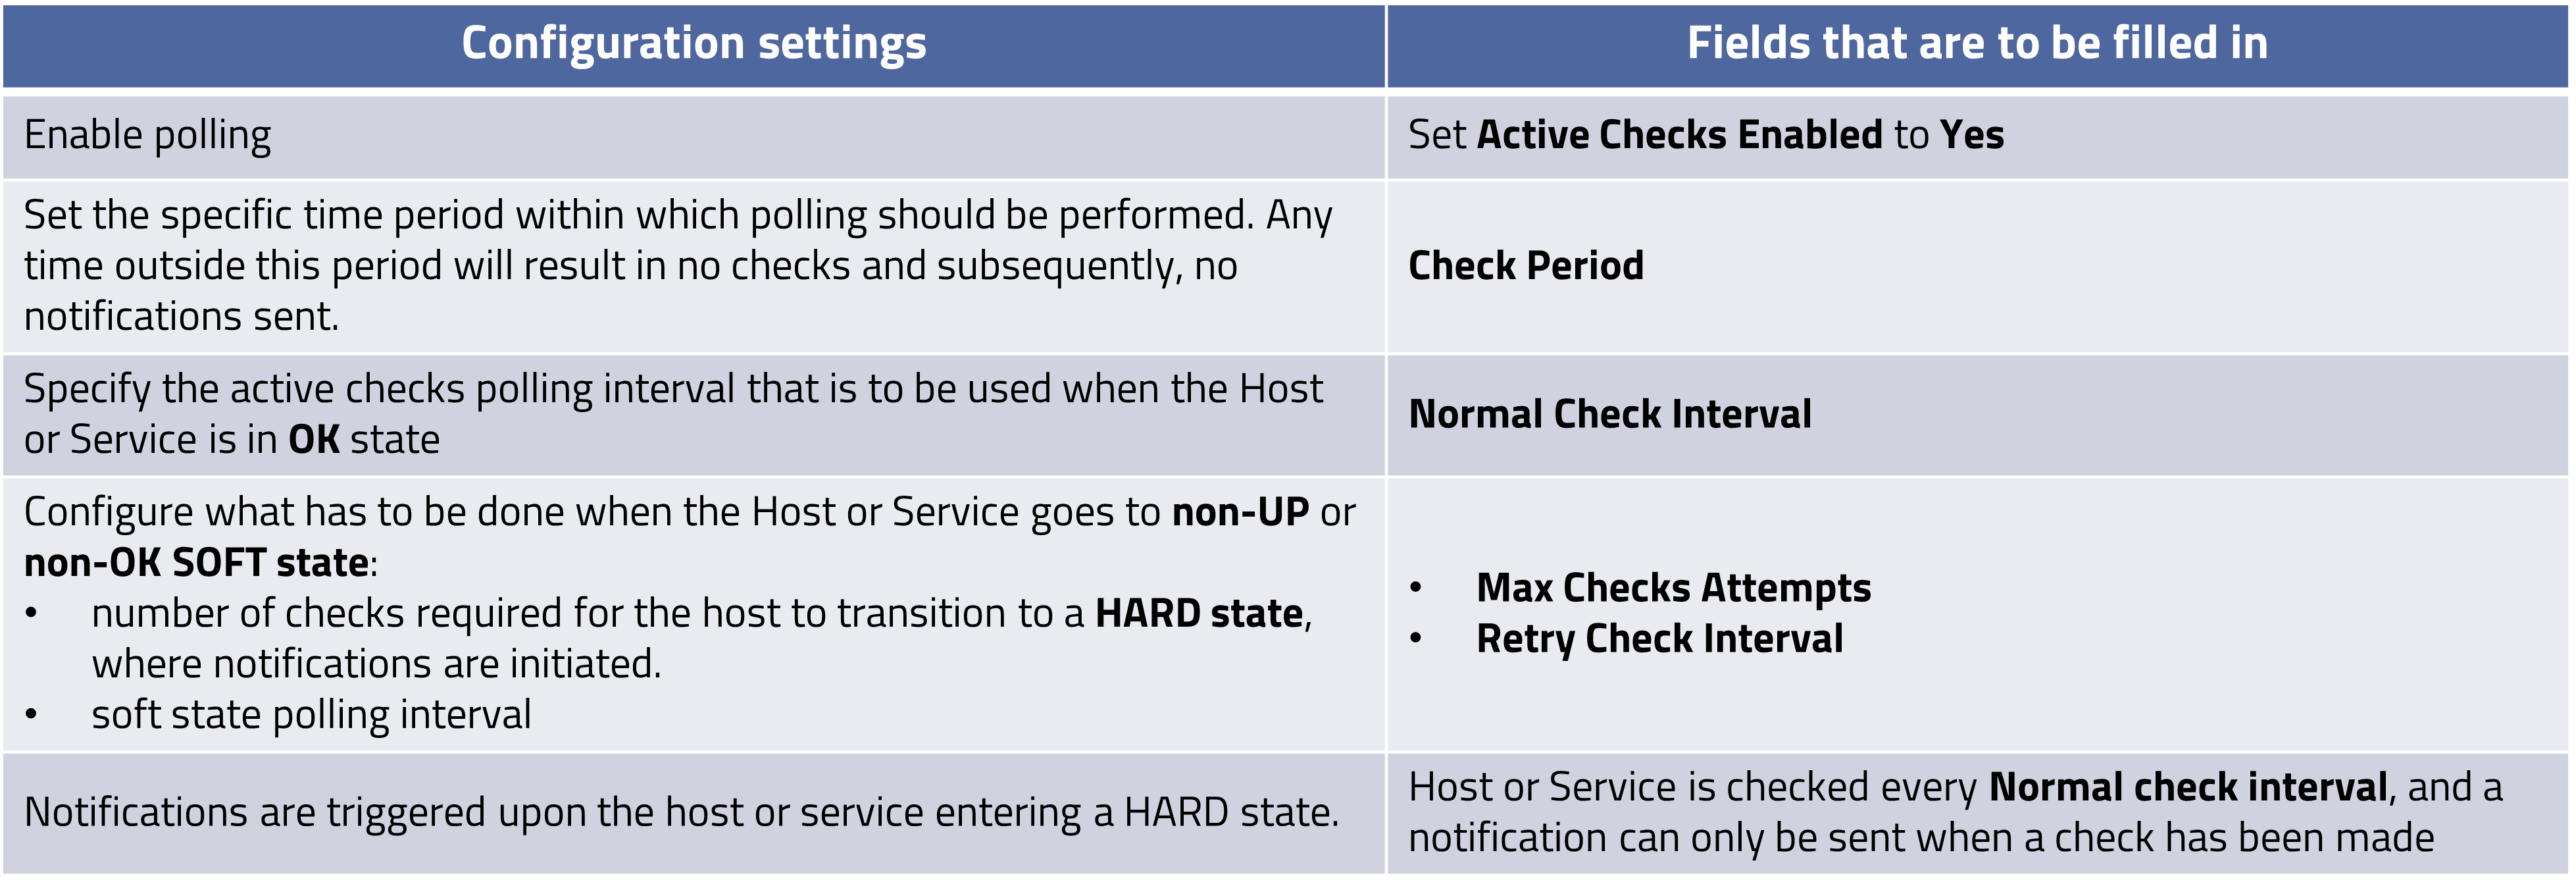
Step 1: Polling configuration
- Go to Configuration > Hosts > Hosts or Configuration > Services > Services by host and select a Host or a Service.
- The Host Configuration > View a Host or General Information > View a Service opens, respectively
- Fill in the fields in Scheduling Options section. If no values are set here, the Host or Service will inherit the values from its parent template.
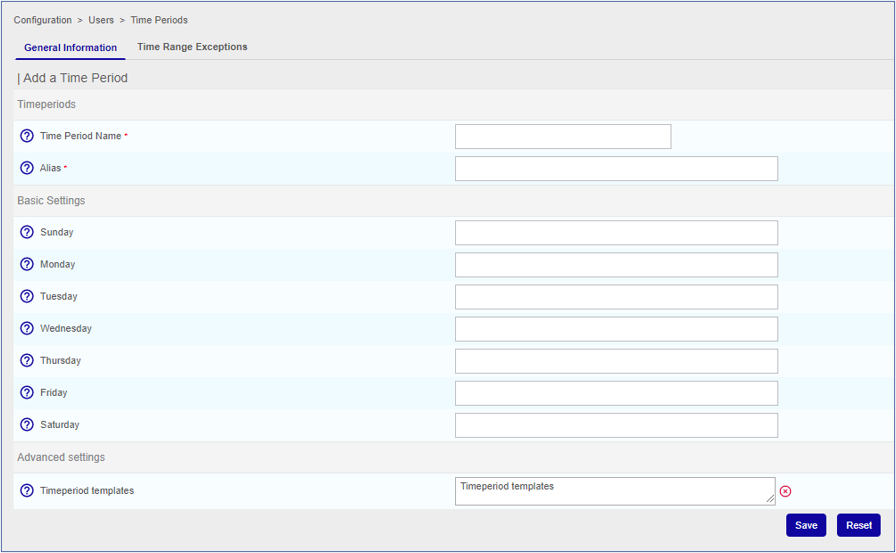
Step 2: Notifications setting – Time Periods
Configuration -> Users -> Time Periods
Configure the time periods during which notifications will be sent. Preconfigured time periods are available
To add a new time period click on Add.
The Add a Time Period window opens.
General Information tab
Timeperiods
Time Period Name: enter a meaningful name
Alias: additional description
Basic Settings
Enter start and end time (in this format hh:mm-hh:mm) of periods during which notifications are to be sent.
Time Range Exceptions tab
Enter specific time periods whose settings override normal periods ones
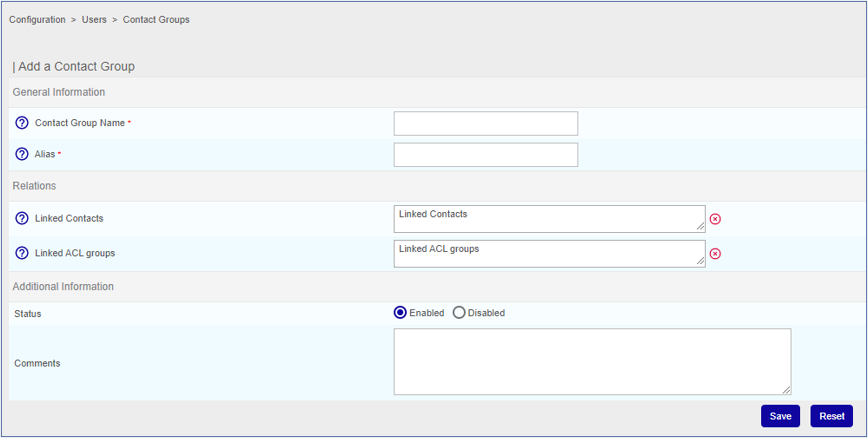
Step 3: Notifications setting - Contact Groups
Contact Groups are groups of contacts that should receive notifications (notification recipients).
Configuration -> Users -> Contact Groups
To add a new Contact Group click on Add. The Add a Contact Group window opens.
General Information
Contact Group Name: enter a meaningful name
Alias: additional description
Relations (optional. Can be configured at a later time)
Linked Contacts: enter the Contacts (group members).
Linked ACL groups: enter ACL group(s) that are to be linked to the Contact group. An ACL group is, as the name says, a group of ACLs. They are used to grant users rights on IT Monitoring GUI, monitored Hosts and Services, notification actions, etc.
Additional Information
Status: select Enabled in order to enable the group
Step 4: Notifications setting – Contact Templates
Configuration -> Users -> Contact Template
Contact Templates are used to associate notification settings to Contacts/Users. A preconfigured generic template (generic-contact_template) is available. It can be edited or new ones can be created.
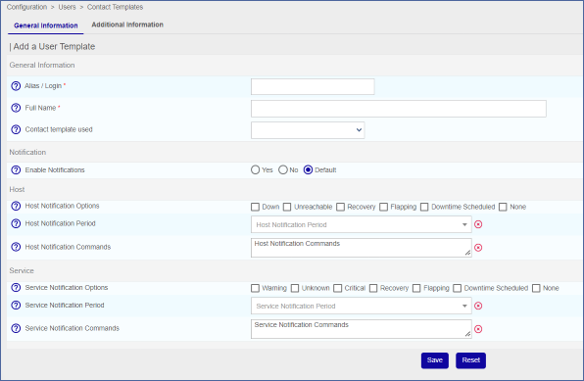
To add a new Contact Template click on Add. The Add a User Template window opens.
General Information**
- Alias / Login: use a meaningful name
- Full Name: description
Notification
- Enable Notifications: select Yes to enable notifications
Host/Service
- Host/Service Notification Options: select the Hosts/Service status for which notifications have to be sent to the user that is being configured.
- Host/Service Notification Period: select the notification time period.
- Host/Service Notification Commands: specify the command(s) that is(are) to be used to notify the user that is being configured. Preconfigured templates are available for different notification channels: Email, Slack, Teams, Telegram, SMS.
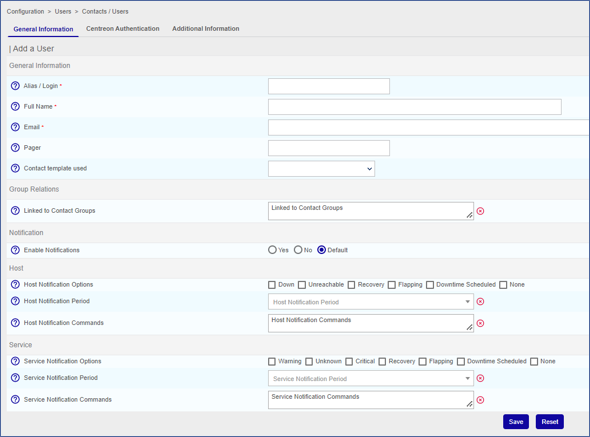
Step 5: Notifications setting – Contacts / Users
Configuration -> Users -> Contact / Users
This section lets you define new Users that will access the system and/or will receive notifications, configure existing ones and also and associate users to Contact Groups.
To add a new User click on Add. The Add a User window opens.
Group Relations
Linked to Contact Groups: links the user to the Contact Group(s) the he/she should belong to.
Notification
Enable Notifications: select Default.
Host/Service
- Host/Service Notification Options: select the Hosts/Service status for which notifications have to be sent to the user that is being configured.
- Host/Service Notification Period: select the notification time period.
- Host/Service Notification Commands: specify the command(s) that is(are) to be used to notify the user that is being configured. Preconfigured templates are available for different notification channels: Email, Slack, Teams, Telegram, SMS.