Smart Poller Configuration
Poller configuration
- i-Vertix4 Poller
- i-Vertix3 Poller
To attach a Smart Poller i-Vertix4 to a Central Management, please follow these instructions:
-
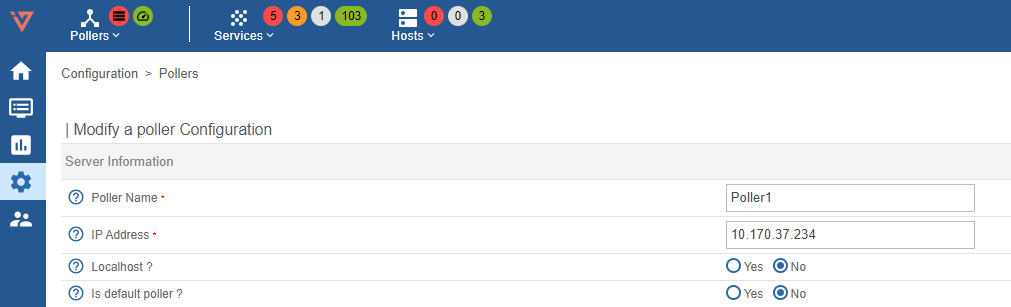
go to Configuration -> Pollers -> Pollers

-
Click on Poller1 Poller1
-
Rename Poller1 with a new name, according to your internal naming convention
-
Enter the IP address of the Smart Poller
-
Save this configuration by clicking Save at the top right corner

Broker configuration
-
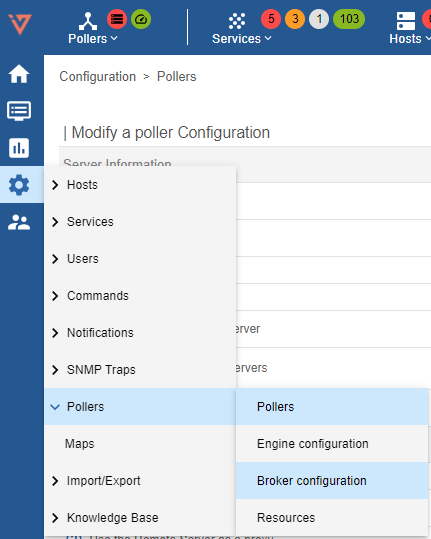
go to Configuration -> Pollers -> Broker configuration
-
Click on Poller1 Poller1
-
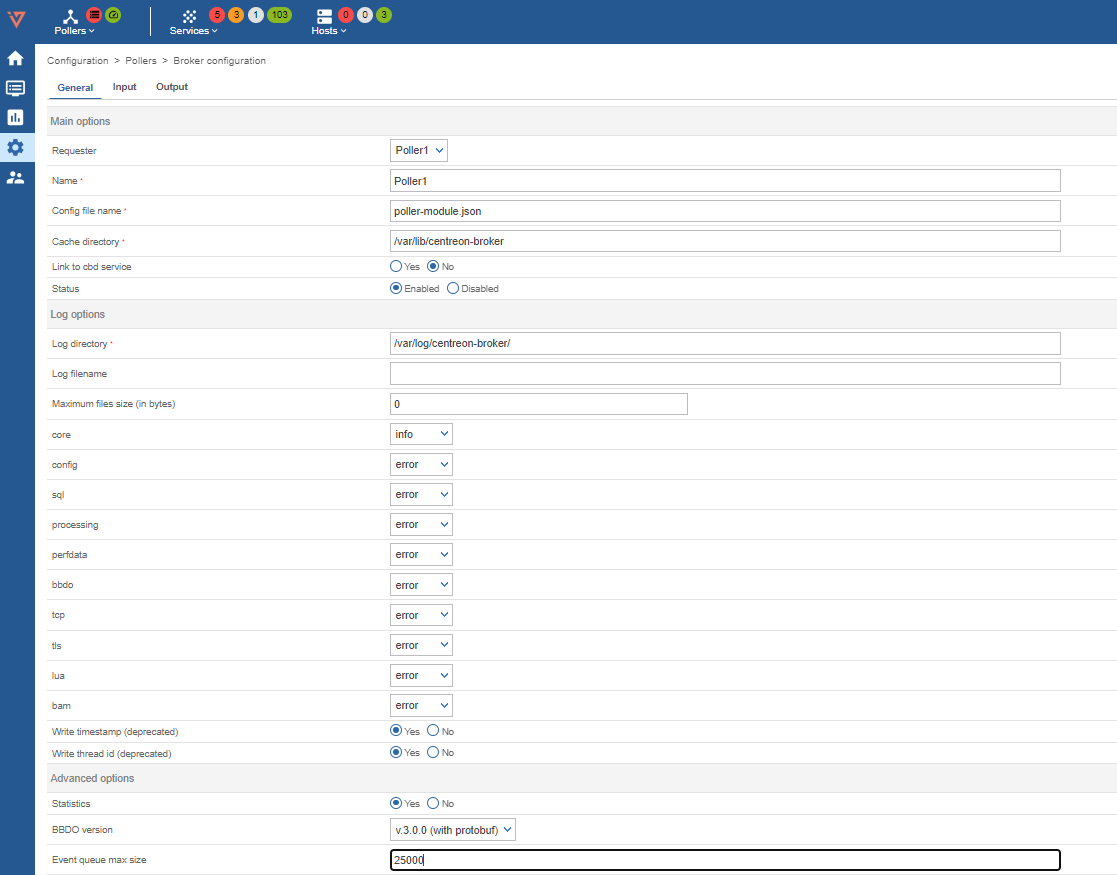
In the General tab rename Poller1 with a new name, according to your internal naming convention
-
Set the field "Event queue max size" to 250000
-
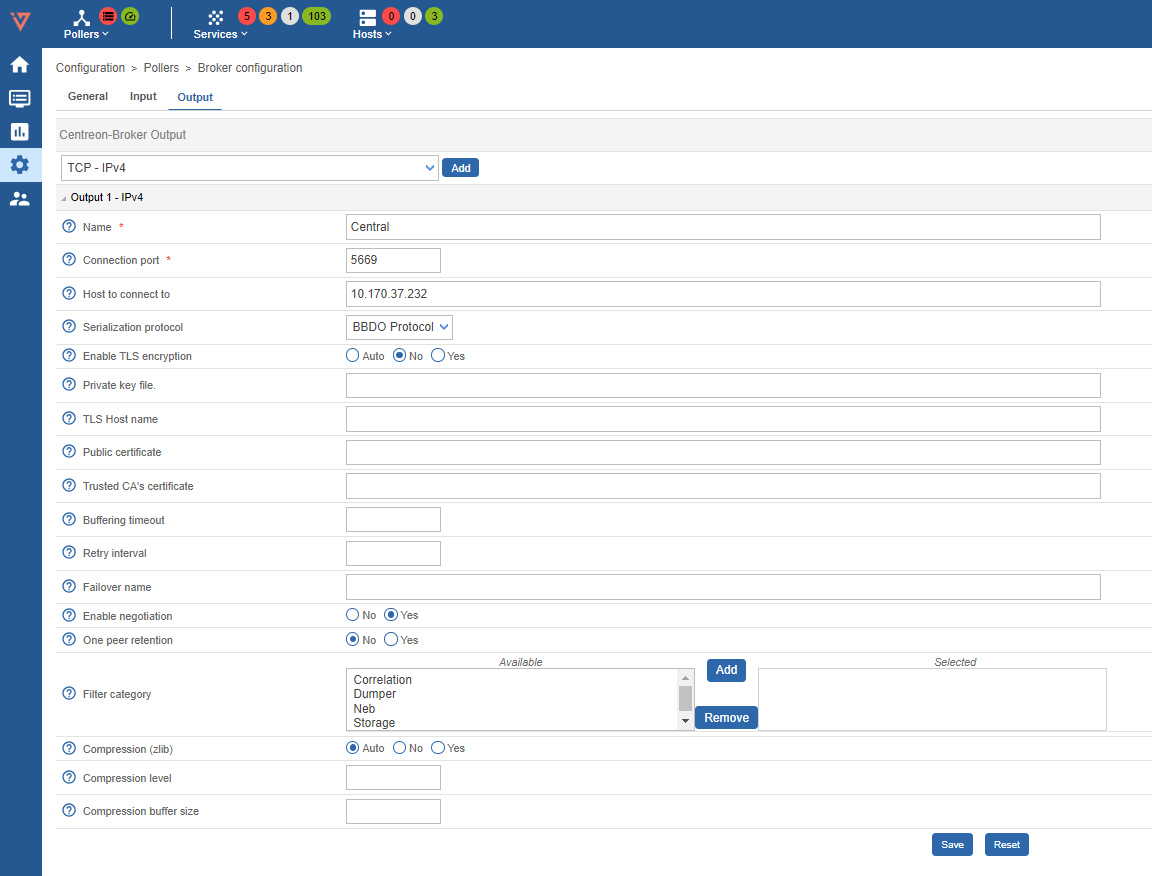
Select Output tab and enter the Central Manager IP "Host to connect to" filed
-
Save this configuration by clicking Save at the top right corner
Engine configuration
-
go to Configuration -> Pollers -> Engine configuration
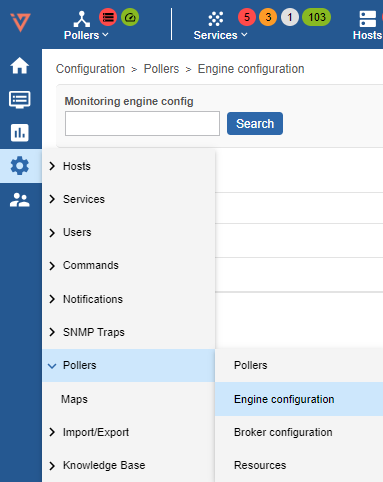
-
Click on Poller1 Poller1
-
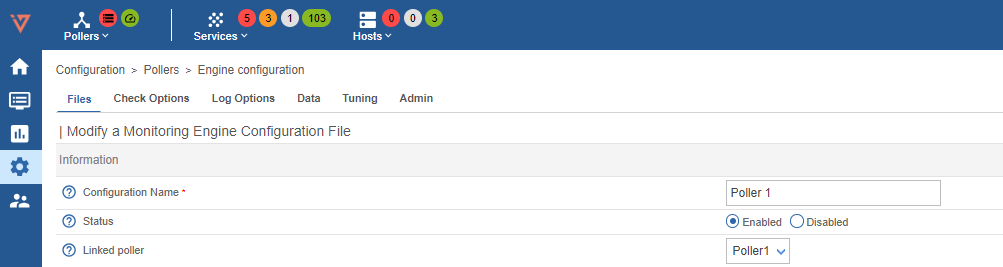
In Files tab configuration Name: replace "Poller1" with a new poller name, as per your naming convention
-
Go to Data tab
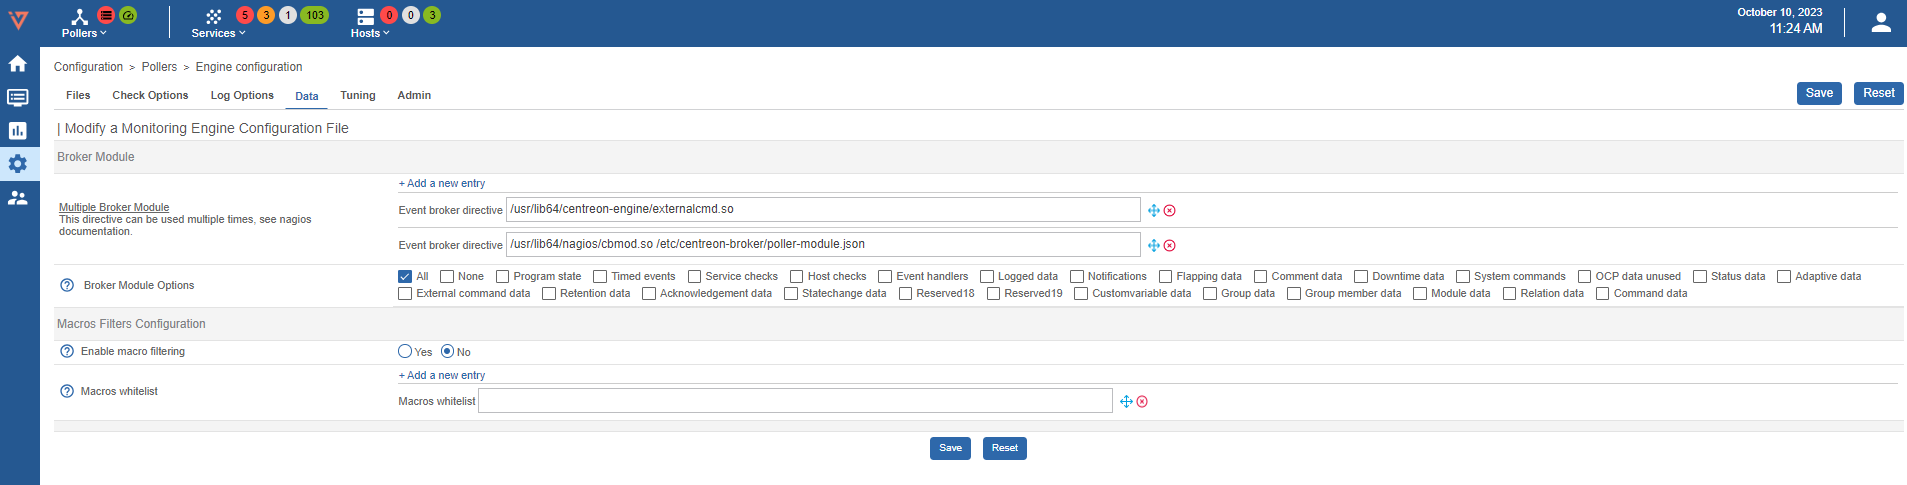
-
Enter two empty brocker directive like the image below (clik + Add a new entry twice):

And write the first path on the first directive and the second on the following one
/usr/lib64/centreon-engine/externalcmd.so/usr/lib64/nagios/cbmod.so /etc/centreon-broker/poller-module.jsonThe result should be like the image below

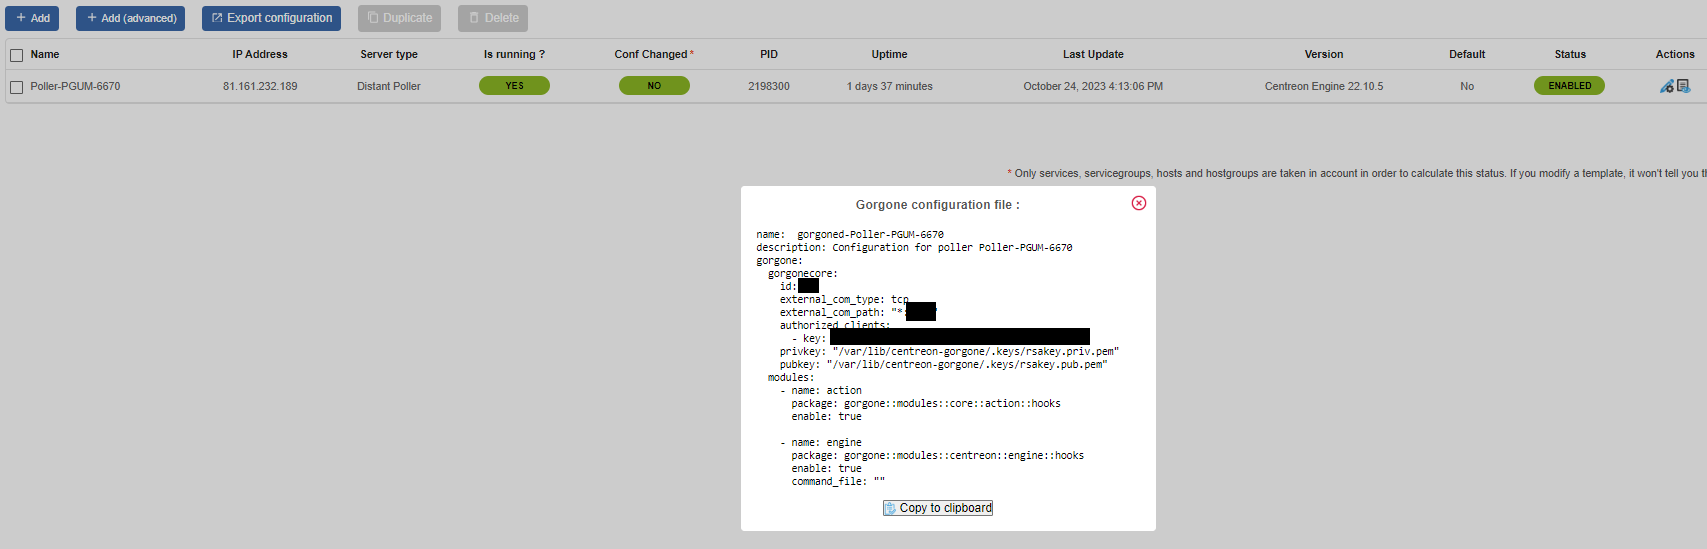
Gorgone configuration export
Create the Gorgone configuration for the new Poller
-
logon on your i-Vertix Central GUI and go to Configuration -> Pollers
-
click on the ICON “Gorgone configuration” under Actions

-
following page should appear
-
click Copy to clipboard

-
Now login to the i-Vertix4 Poller through SSH and become root
-
Paste the copied information and submit
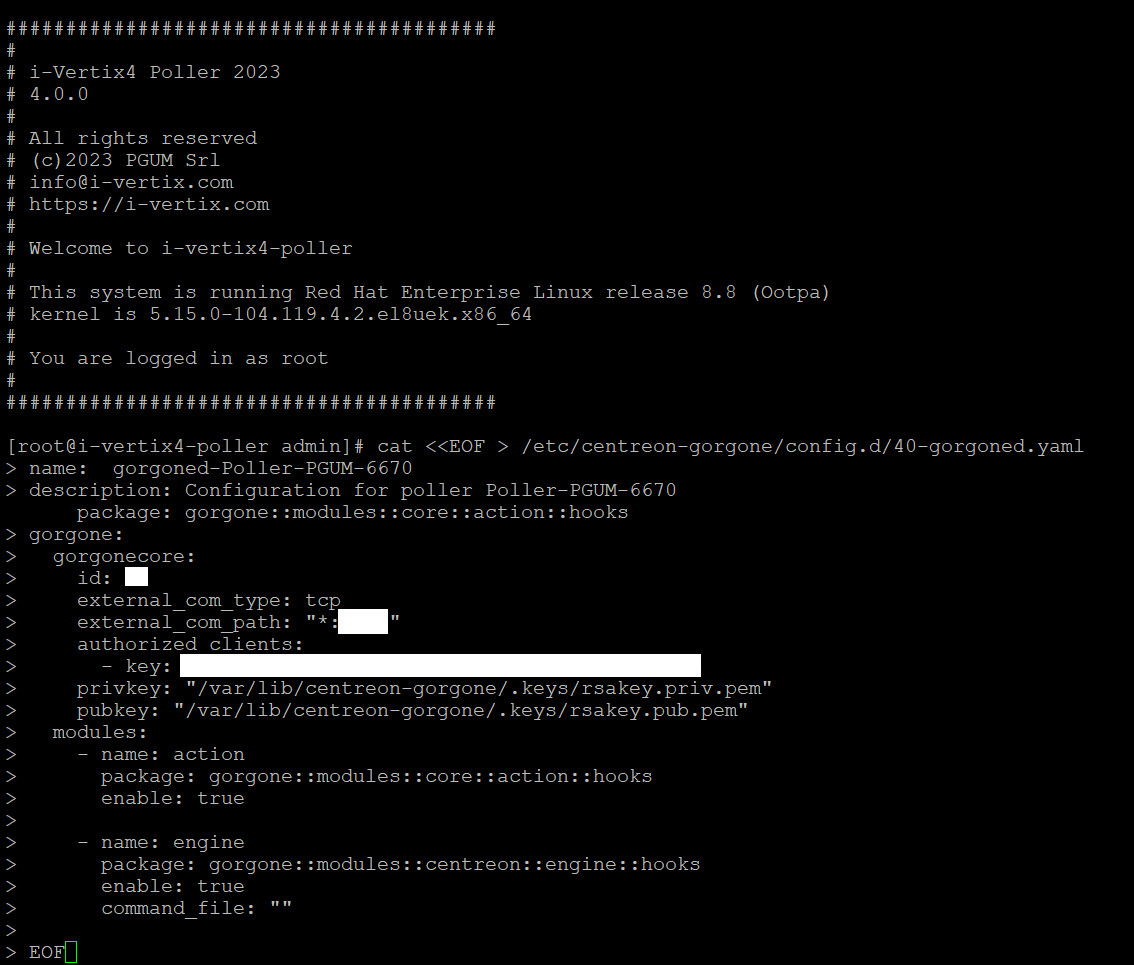
-
Restart the gorgone deamon on your Poller
systemctl restart gorgoned.service
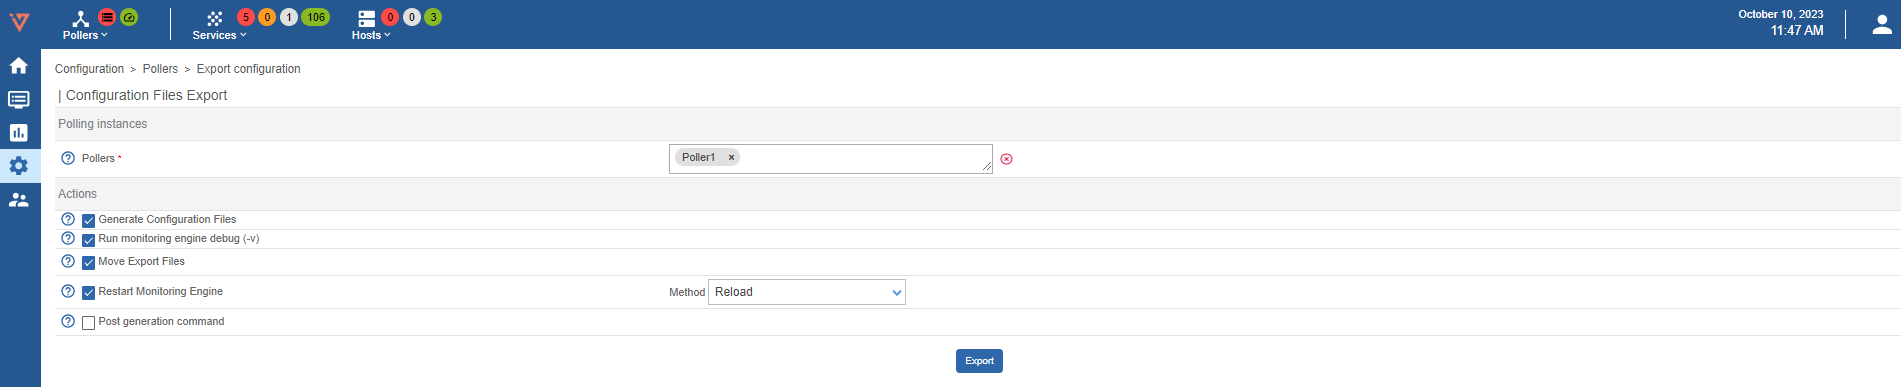
Pollers restart
-
Go to Configuration -> Pollers -> Pollers
-
Select the Smart Poller that is being configured

-
Click on Export configuration

-
Select the first 4 options (at left) , then select Method -> Restart in the drop down menu
-
Log on to the Central Management (SSH) do a sudo bash and enter the password
MandatoryThe following steps are mandatory in any case Central Manager performs such a synchronization every 4 hours
-
Launch the following command:
sudo ./opt/pgum/scripts/i-vertix/sync_poller.sh -
In case the system asks for a yes/no confirmation answer yes, the CLI will show as many "ok" as the number of Pollers that are being synchronized
-
Final check in the GUI under Configuration -> Pollers -> Pollers
Check if the configuration is like the one shown in the picture.

Synchronize the Plugins from Central to the Poller
sudo ./opt/pgum/scripts/i-vertix/sync_poller.sh

To attach a Smart Poller i-Vertix3 to a Central Management, please follow these instructions:
-
go to Configuration -> Pollers -> Pollers
-
Click on Poller1 Poller1
-
Rename Poller1 with a new name, according to your internal naming convention
-
Enter the IP address of the Smart Poller
-
Save this configuration by clicking Save at the top right corner
Broker configuration
-
go to Configuration -> Pollers -> Broker configuration
-
Click on Poller1 Poller1
-
In the General tab rename Poller1 with a new name, according to your internal naming convention
-
Set the field "Event queue max size" to 250000
-
Select Output tab and enter the Central Manager IP "Host to connect to" filed
-
Save this configuration by clicking Save at the top right corner
Engine configuration
-
go to Configuration -> Pollers -> Engine configuration
-
Click on Poller1 Poller1
-
In Files tab configuration Name: replace "Poller1" with a new poller name, as per your naming convention
-
Go to Data tab
-
Enter two empty brocker directive like the image below (clik + Add a new entry twice):
And write the first path on the first directive and the second on the following one/usr/lib64/centreon-engine/externalcmd.so/usr/lib64/nagios/cbmod.so /etc/centreon-broker/poller-module.jsonThe result should be like the image below
Pollers restart
-
Go to Configuration -> Pollers -> Pollers
-
Select the Smart Poller that is being configured
-
Click on Export configuration
-
Select the first 4 options (at left) , then select Method -> Restart in the drop down menu
-
Log on to the Central Management (SSH) do a sudo bash and enter the password
MandatoryThe following steps are mandatory in any case Central Manager performs such a synchronization every 4 hours
-
Launch the following commands:
sudo ./opt/pgum/scripts/i-vertix/sync_poller.sh -
In case the system asks for a yes/no confirmation answer yes, the CLI will show as many "ok" as the number of Pollers that are being synchronized
-
Final check in the GUI under Configuration -> Pollers -> Pollers
Check if the configuration is like the one shown in the picture: