Peripherals
In a peripheral form, the following information is available:
- General characteristics of the peripheral:
- Vendor
- Model
- Type
- Serial number
- ...
- Peripheral management:
- Technical person in charge
- Status
- Location
- ...
- Peripheral users:
- Users known to i-Vertix ITAM or not
- Groups of users
- ...
Management type:
It is possible to manage peripherals either unitary or globally.
Unitary management corresponds to one peripheral per computer while global management make the peripheral a virtual global element that will be connected to several computers.
Global management allows to limit the number of elements to manage when these elements are not a strategic data in the assets management.
It is possible to use templates with peripherals.
The different tabs
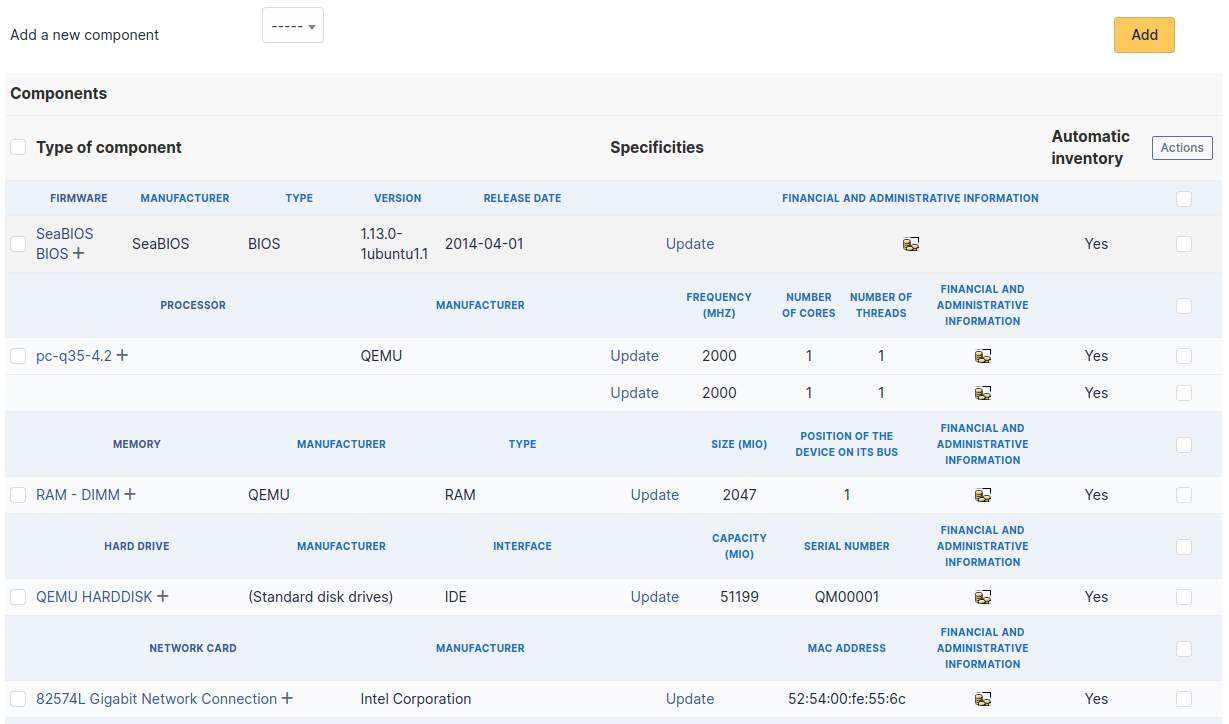
Components
This tab, named Components and visible in a Computer entry, allows to manage the hardware components of a computer.
Adding or managing components is located in menu Setup > Components.
If several components of the same type are used, they will be grouped in the view.

It is possible to add a component by first selecting its family in the drop-down list at the top of the table and then its name and the number of components to add.

Starting from a computer view, it is possible to modify a component by clicking on the link under its name.

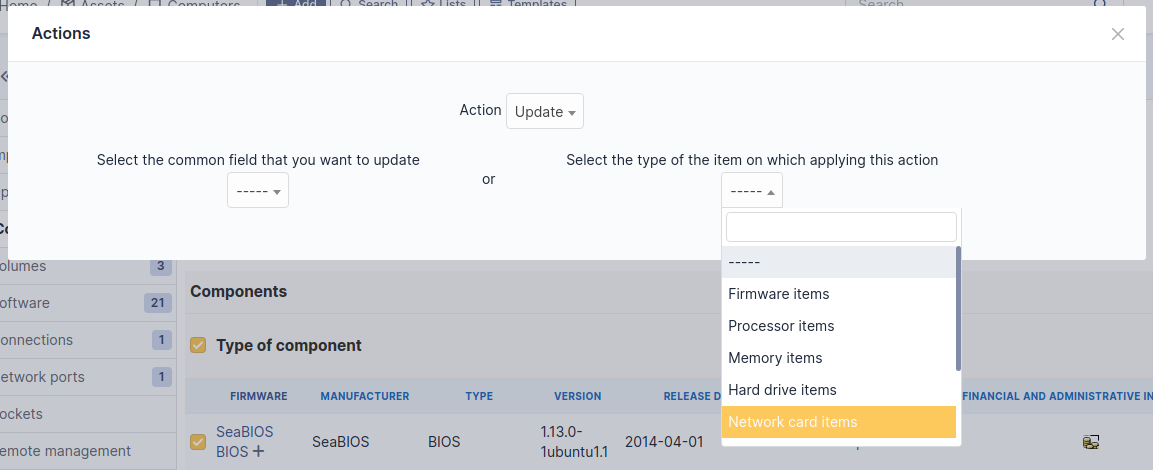
To act on several components (for example modify an element of the component, activate accounting information or modify them, delete a component...), first select the components and then use the Actions button present at the top or the bottom of the list.
If several types of different components, not having the same characteristics, are selected for modification, in the actions it will be asked on which component modification must be applied.
Selection button in left column allows to select all the components at once.
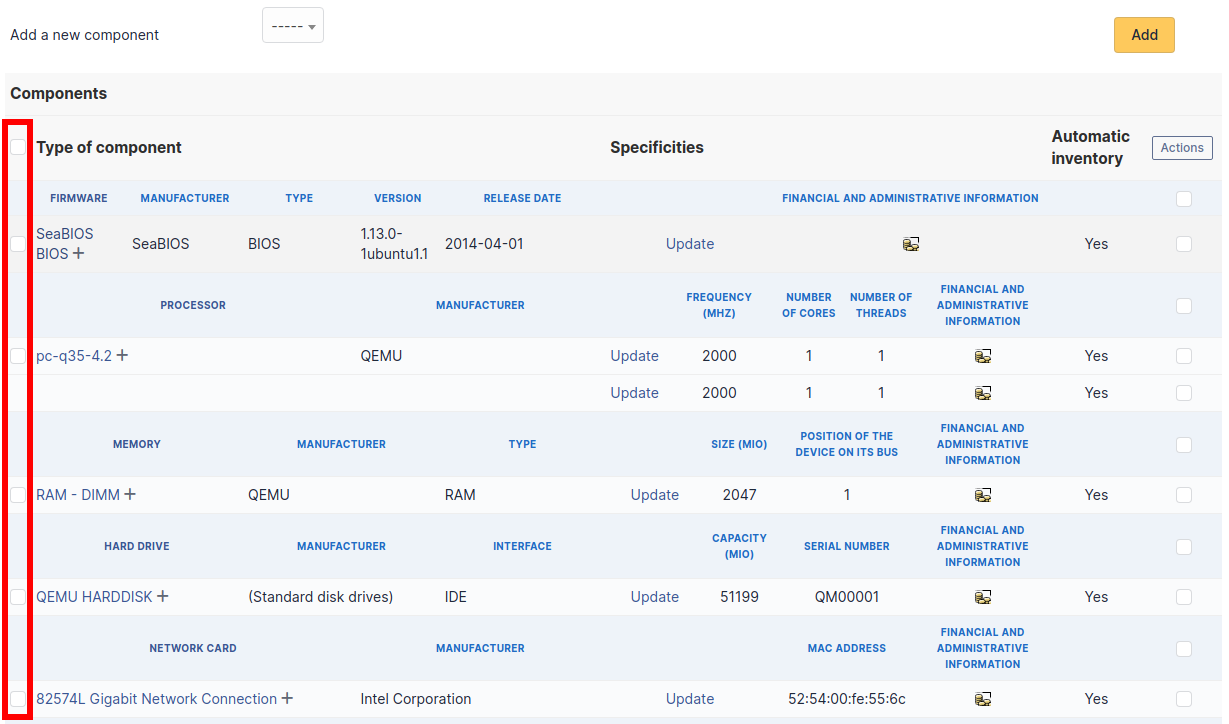
Selection at right of type column (grayed line) allows to select all components of the same type (processor, memory, network interface...).

It is possible to modify the characteristics of a component only for one computer
From tab Elements of the component, click on the link Update.

Several tabs are then displayed:
- Tab "Element - Link name of component" : list the characteristics of this component
- Tab "Management" : manage administrative and accounting information
- Tab "Documents" : attached documents
- Tab "History" : history of modifications
- Tab "Contract" : contracts management
- Tab "Debug" : only if you are connected in Debug mode
- Tab "All" : all the information are displayed on a single page
Every deletion or addition of a component is recorded in the history of the computer.
If using native inventory or third-party inventory tool, the components information can be automatically imported and updated.
Connections
This tab allows to manage the direct connections between a computer and its connected elements.
Direct connections represent the relation between different hardwares linked either physically or virtually.
From a computer
The connection can be made toward one or several elements of type display, printer, peripheral or phone. For each type of connected object, its name, serial number and inventory number are displayed.
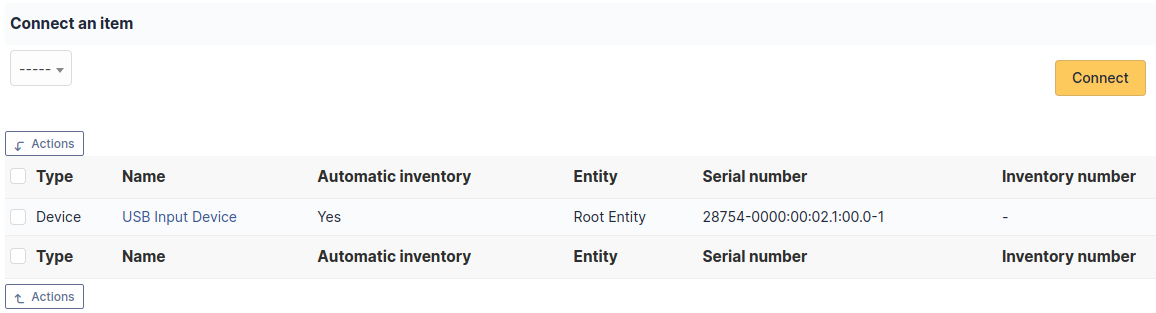
From an element other than a computer
To add a connection, select the computer in the drop-down list presented at top of the table.

If this case, the connection can only be made to a single computer. The table will list the name of this computer as well as its serial and inventory numbers.
The deletion of a connection can be made from the entry of each connected hardware (tab Connections) via mass actions.
Every deletion or addition of a connection is recorded in the history of the computer.
If using native inventory or third-party inventory tool, the connections informations can be automatically imported and updated.
Network ports
This tab, named Network ports and visible in a Computer entry, allows to manage the network ports attached to a computer.
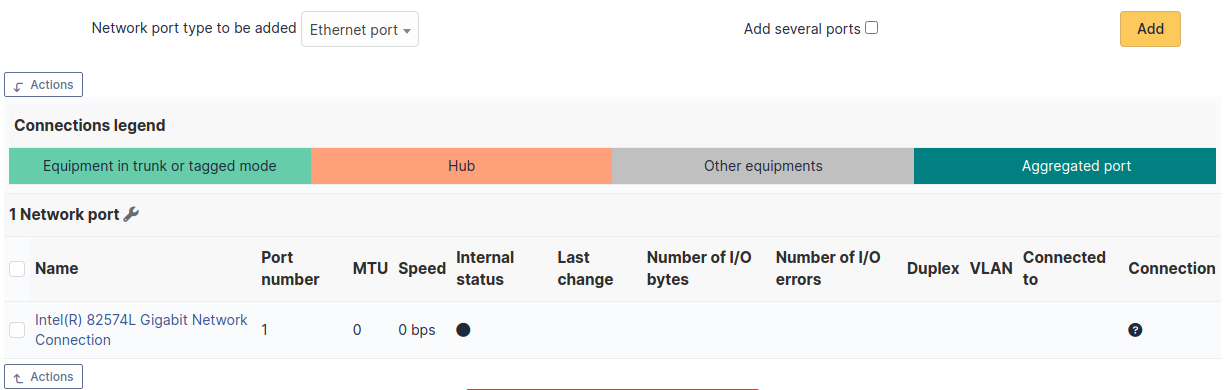
A network port represents the output of a network interface on a given hardware. A port is characterized by a number and a name.
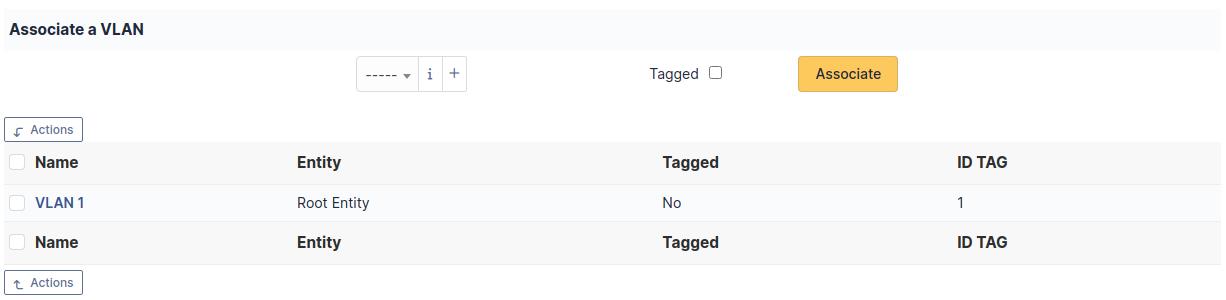
It is possible on a network port to add one or more VLAN, these VLANs being defined by a name, an optional comment and a VLAN number.
One or more network name can be associated to each network port. This can be done in tab Network name.
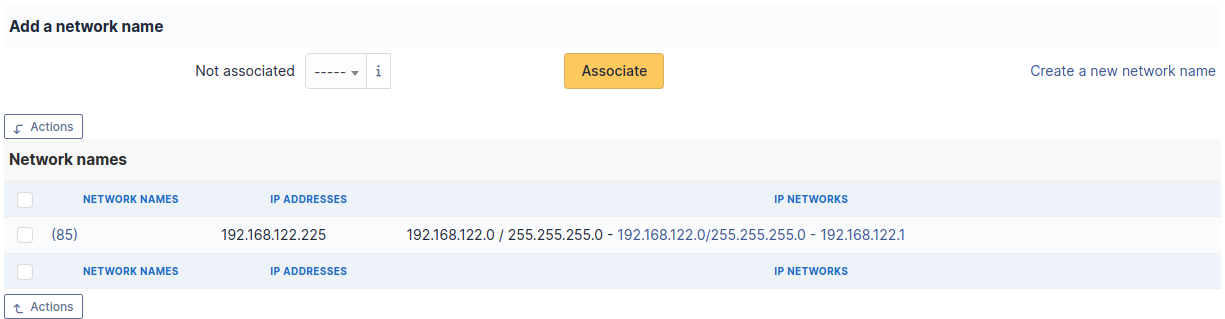
When a network port has only one network name, this name is displayed in the network port form itself and it is possible to modify the name directly. It is also possible to modify the network name via its own form, accessible by clicking on the link under the name.
When a network port has several network names, the only way to modify the network names is via the network name form.
Network ports can be of different types:
- physical port: ethernet, WiFi...
Virtual network port: local loop-back, alias, aggregates...- point to point: switched network...
The Network port tab groups in a table the ports that are available on the equipment. The table header contains the total number of ports and a link that allows to choose display options. This allows to selectively display or mask information such as network data (IP...), port characteristics depending on its type, MAC address, VLANs...
i-Vertix ITAM allows to present complex network connection with for example WiFi or Ethernet port aliases associated to VLANs grouped in aggregates...
Management of Ethernet network ports
The Ethernet protocol is classically used on internal networks.
An Ethernet port is characterized by its type (twisted pair, mono-mode/multi-mode optical fiber...), a transfer rate ((10Mb, 100Mb, 1Gb, 10Gb...) and a MAC address. It is possible to associate to the port a network card and a network plug.
Ethernet connections are realized by linking two Ethernet ports, which requires that there is a free port on each equipment to be connected. In general, a connection links a port attached to a computer, a peripheral or a printer and a port attached to a network equipment (hub, switch).
Management of WiFi network ports
The WiFi protocol is widely used on wireless networks.
A WiFi port is characterized by the mode of the network card (ad-hoc, access point, repeater...), the WiFi protocol version (ab, g...) and its MAX address.
It is possible to associate a network card to the port, similarly to Ethernet ports.
A WiFi network can be associated to a given port. Apart from its name, a WiFi network has an ESSID and is characterized by its type:
Infrastructure: WiFi network with on or several access points and connected clients Ad-hoc: WiFi network between similar systems without access points
Management of local loop-back ports
The local loop-back is a virtual port used by most equipments for
internal communication. It is this port that is used when connecting to
localhost or 127.0.0.1.
Local loop-back has no specific attribute.
Management of network port aliases
A network port alias is a virtual port that can refine a physical port.
On Linux, to each VLAN, when transmitted tagged, is associated a port alias, for example eth2.50 to represent VLAN 50 on port eth2.
A port alias contains its base port and a MAC address.
Note that when the origin port is changed, the MAC address of the new port is affected to the port alias.
Management of network port aggregates
A network port aggregate is a virtual port that allows to group several physical ports.
On Linux, aggregates are represented by bridges linking together different ports. In the same way, an Ethernet firewall uses a bridge that links interfaces to be filtered.
A port aggregate contains the origin ports and a MAC address.
Every deletion or addition of a network port is recorded in the history of the computer.
If using native inventory or third-party inventory tool, the network ports information can be automatically imported and updated.
Management
Management of financial and administrative information, this information is visible in the 'Management' tab on the computer's form.
By default this management is disabled. It is possible to activate the financial information on any type of object in the inventory by using the link in the Management tab of the material detail.
![]()
It is possible to activate the administrative and financial information from the massive actions on a set of elements (computer, monitor, ...)
It is possible to activate the administrative and financial information as soon as an element is created. See "Enable default administrative and financial information" option in Setup > General > Asset tab.
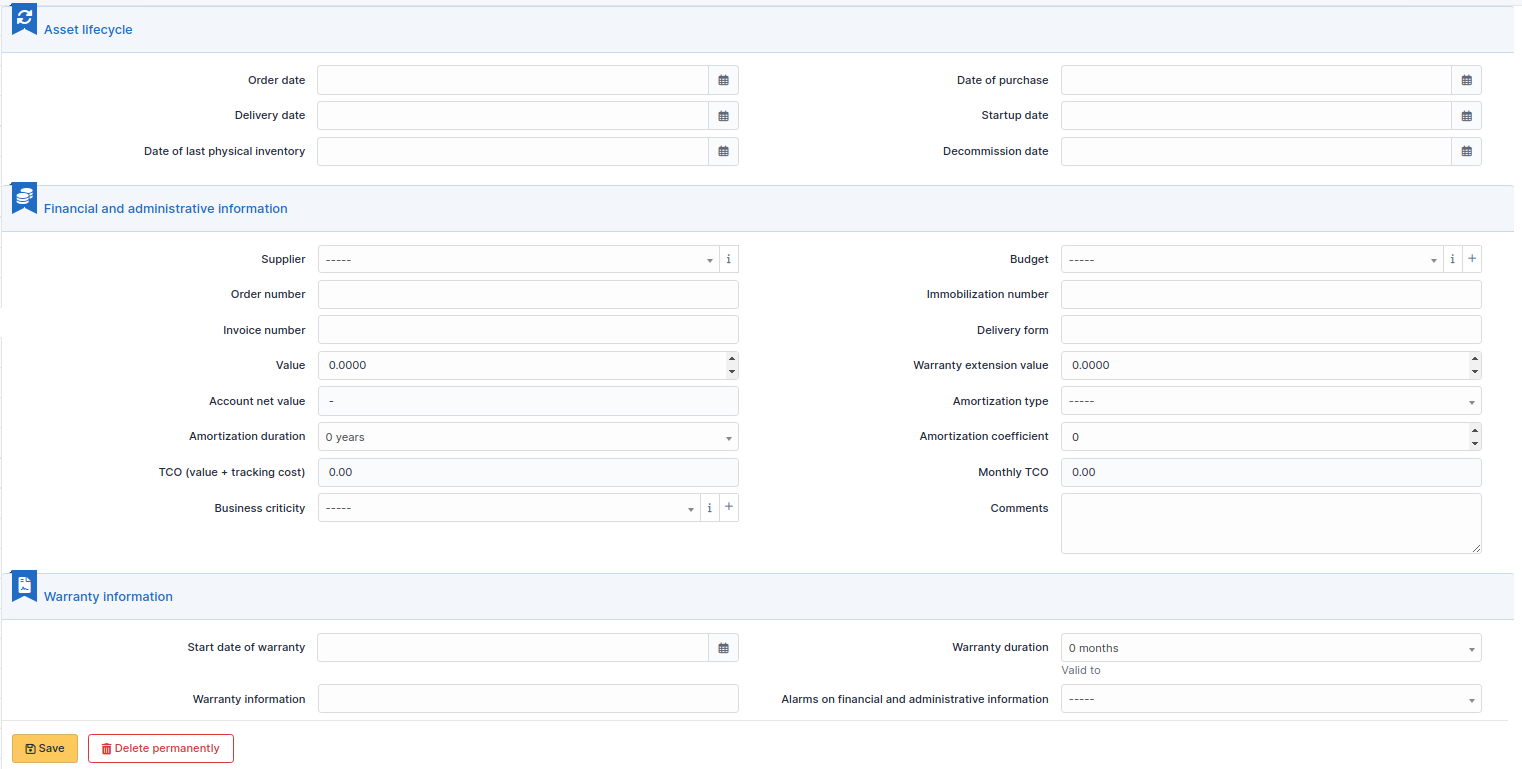
Financial information consists of the following items:
Lifecycle
- Order date
- Date of purchase
- Delivery date
- Date of implementation
- Date of last physical inventory
- Date of reform
Financial and administrative information
- Supplier: Third party who sold the equipment. See Managing suppliers. Suppliers are managed from the menu Management > Suppliers.
- Order number : number of the order of the equipment.
- Asset number.
- Invoice number: equipment invoice number.
- Delivery note: delivery note for the equipment.
- Value: cost of the equipment.
- Warranty extension value: cost of the warranty extension, but preferably use contracts.
- Account net value: this is the automatic calculation of the gross value of a piece of equipment minus the amount of depreciation.
- Type of depreciation: choice of the type of depreciation between linear and declining balance.
- Depreciation period: depreciation period expressed in years.
- Depreciation coefficient: coefficient applied to a straight-line depreciation type in order to obtain the values of the declining balance type. It is therefore only used if the type of depreciation is declining balance.
- TCO (value+amount of interventions): the total cost of ownership which includes all the constituent elements of an invoiced product.
- Budget: the budget on which this equipment was purchased See Managing the budget.
- Order date: date on which the material was ordered.
- Purchase date: date on which the equipment was purchased.
- Delivery date: date on which the equipment was delivered.
- Startup date: date on which the equipment was put into service.
- Date of last physical inventory: date of the last physical inventory of the equipment.
- Comments.
- Monthly TCO: TCO divided by the number of months between today's date and the date of purchase of the equipment.
Warranty information
-
Warranty start date: date on which the warranty of the equipment starts
-
Warranty information: text qualifying the warranty
-
Warranty period: duration of the warranty expressed in months If a warranty start date and a warranty period are set, the information "Expires on" will appear with a date in red if it is earlier than the current date
All the dates defined can be managed automatically according to changes in the status of the equipment. Some dates can also be copied from another date. All this configuration is done by [entity](administration_entity_delegation.dita).
Tips
i-Vertix ITAM allows you to configure a notification on the expiry of the hardware warranty. This is configurable by entity in notification management to define the models and recipients used and in the administration of entities to enable or disable this feature, define the default values and anticipate the sending of the notification if necessary.
i-Vertix ITAM can perform a simple net book value calculation based on straight-line or declining balance depreciation. To do so, a certain amount of information (value, date, etc.) must be entered. The user must also enter the date of the financial year the general configuration.
The display of financial information for each type of equipment depends on the profile of the user logged in.
Associated Contracts
The Contracts tab is used to show or add linked contracts.
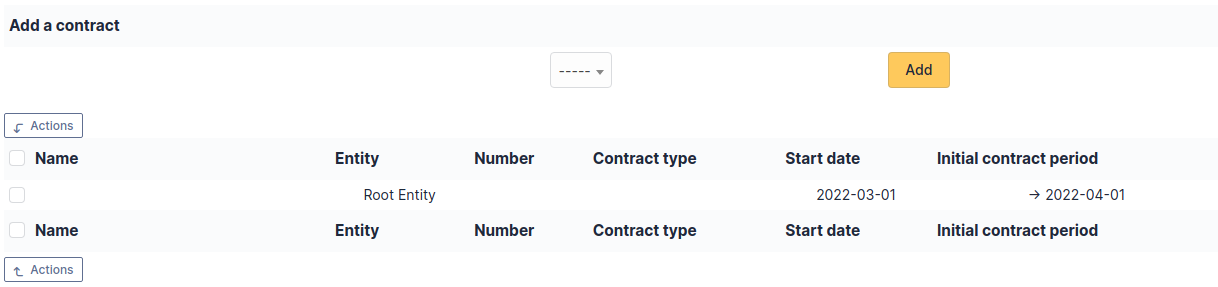
For each associated contract, the name, number, contract type, supplier, start date and initial duration of the contract are listed. In the last field, the end date of the contract is also shown with a red display if the date is earlier than the current date.
Refer to contract management for more information.
Documents
Additional information is stored in the form of external documents which are files uploaded into i-Vertix ITAM. In the Documents tab, documents can be associated and unlinked with the selected item. The management of the documents themselves is dealt with in another chapter.
It is also possible to quickly create a document via this tab by specifying the desired file and optionally the field in which the new document is to be placed. The name of the created document will be based on the name of the added file.
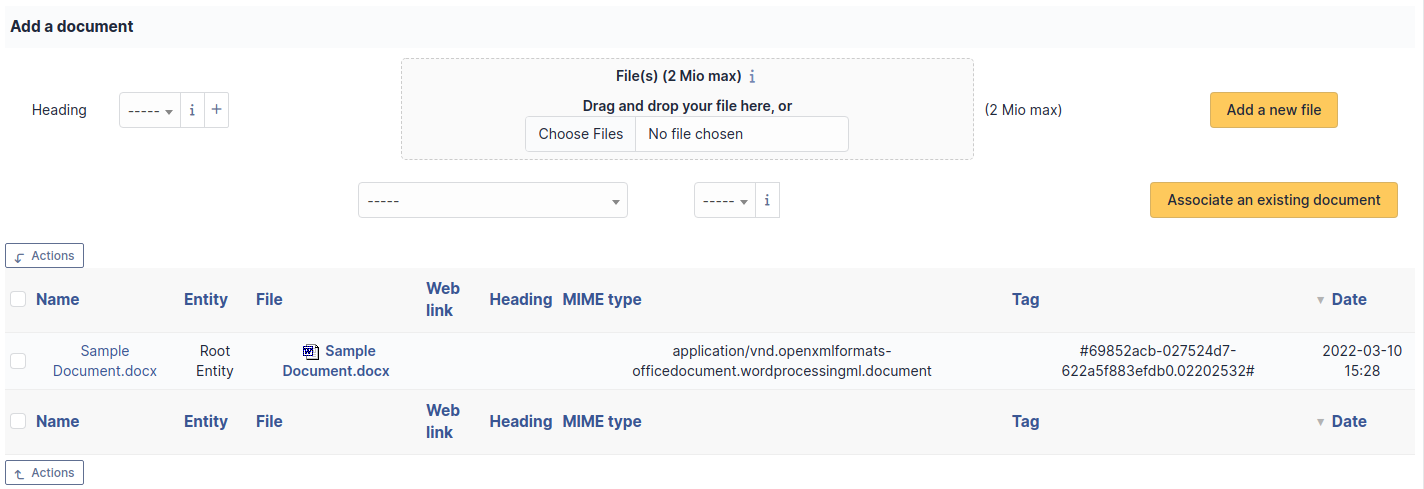
When you delete a document from this tab via mass actions, you only remove the link between the object and the document; the document itself is still present.
Tickets
The Tickets tab is used to create a ticket associated with the current object. It also lists the tickets already linked to the object.
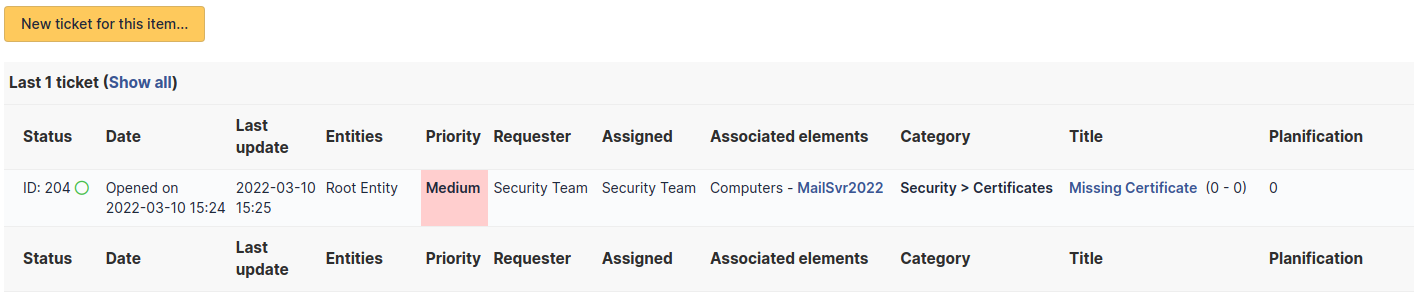
A second table lists the tickets attached to the linked elements
Any deletion or addition of a ticket is recorded in the history.
Problems
The Problems tab is used to create a problem associated with the current object. It also lists the changes already linked to the object.
This summary table includes for each object:
- Status
- Date (opening or expiry date, resolution or closing date depending on the status of the problem)
- Priority
- Requestor(s) and assigned technician(s)
- Associated elements
- Category
- Name
- Column indicating the number of scheduled tasks
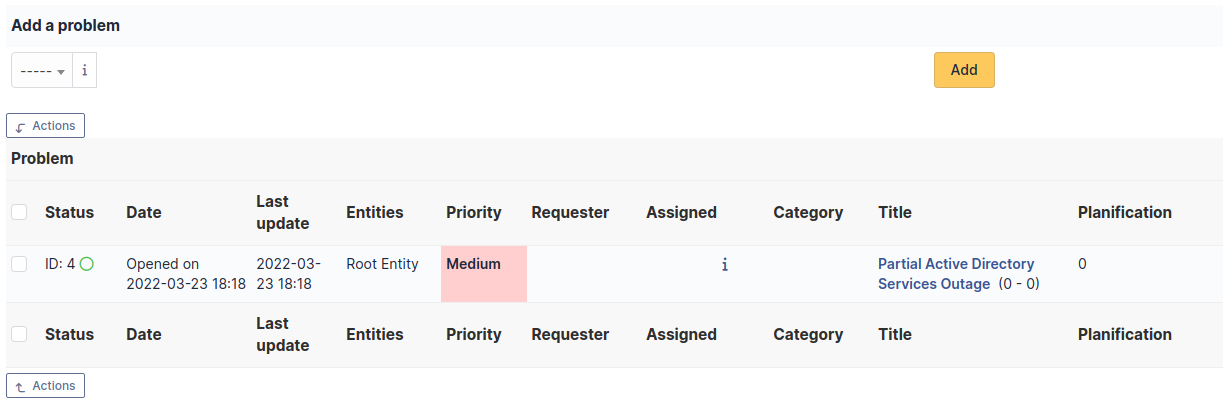
A second table lists the problems attached to the related elements
Any deletion or addition of a problem is recorded in the history.
Associated External Links
The External links tab is used to show associated external links.
For some items, external links are managed from the menu Setup > External links.
These links can use object fields such as IP, name, etc. See Configure protocol external links.
Examples:
- A web link: http://192.168.0.1 (IP retrieved from the network port of the hardware) ;
- A RDP link for remote access: itam://MSTSC.EXE,pc001 (name "pc001" retrieved from the hardware).
Notes
The Notes tab provides a free text field for storing additional information. Notes are displayed in the order of their creation.

History
The History tab is used to show any changes made to an item. The following information about the changes is available:
- ID of the change.
- Date and time the change was made.
- User who made the change. If this field is not filled, it means that the action was done automatically (For example: automatic inventory update).
- Field that was changed.
- Description of the change that was made.
The description of the change represents either the difference between the old and the new value (For example with location field: Change HQ to Remote Office A), or the explanation of the action which was carried out (For example: Uninstallation of a software: "Gimp 2.0").
For dropdowns or objects with a parent/child relationship, the modification of a child will appear in the history of the parent element.
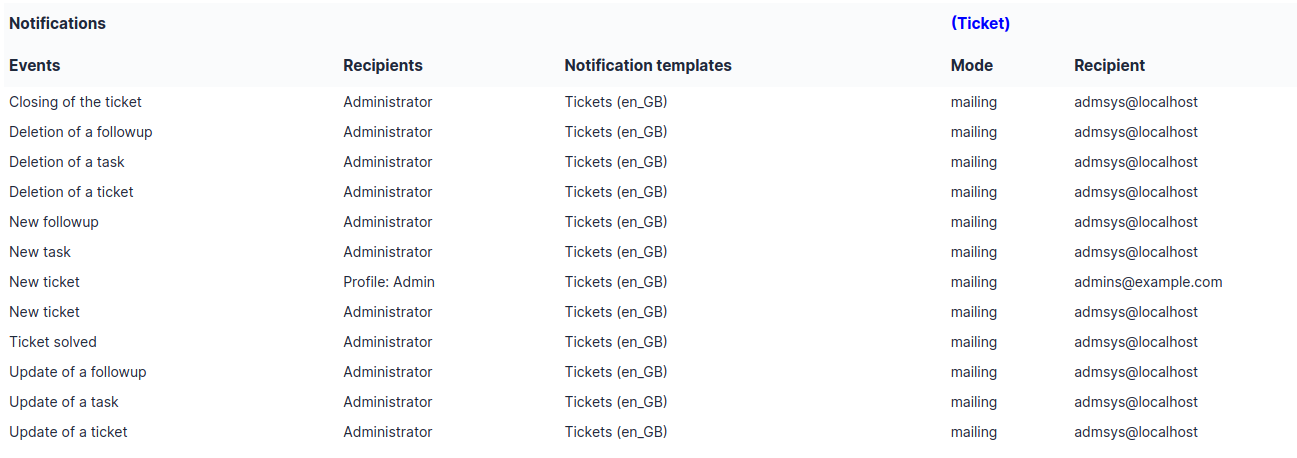
Debugging information
If you have Debug mode enabled in your preferences, a Debug tab will appear before the All tab. This tab offers information to help you resolve an issue.
For example, for a computer, you have one or more tables depending on the affected object (financial information, reservations...) listing the notifications that will be triggered on this computer with:
- Triggering event
- Recipient(s)
- Notification model used
- Recipient(s) email address
All Information
For an item, all information is displayed on one page from the All tab. This shows all of the tabs of an object's form in one view, one below the other.
The different actions
Peripherals do not have specific actions; report to common actions.