Initial Configuration
First CLI login
After completing the configuration procedure in the chosen hypervisor, start the VM. You can check the startup process through the hypervisor console. Once the VM is started, the following screen with a login prompt will be displayed:
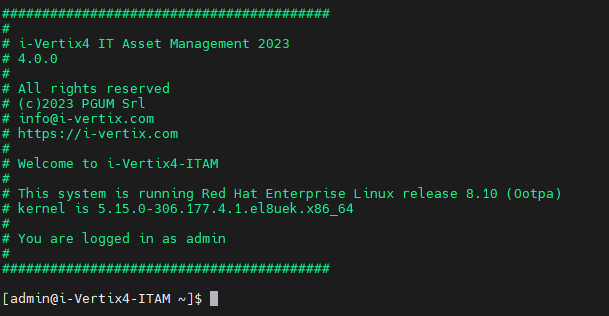
On an i-Vertix ITAM system you will need to log into the i-Vertix console to configure the various settings, using the following credentials:
-
User: 'admin'
-
Password: 'changeme' (please change the password as soon as possible)
After the authentication, a menu that allows you to configure the vm is displayed.
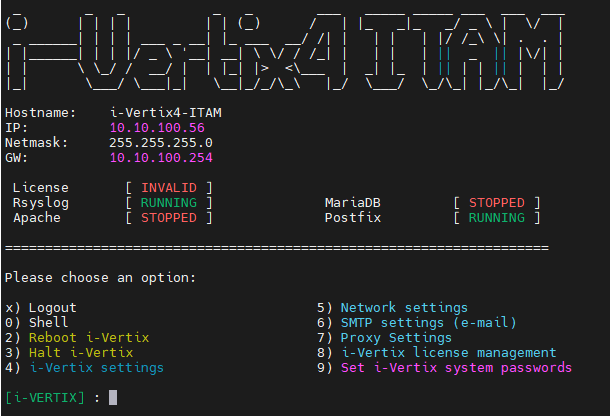
If the menu doesn’t appear automatically at startup, simply type on the console the command
menu
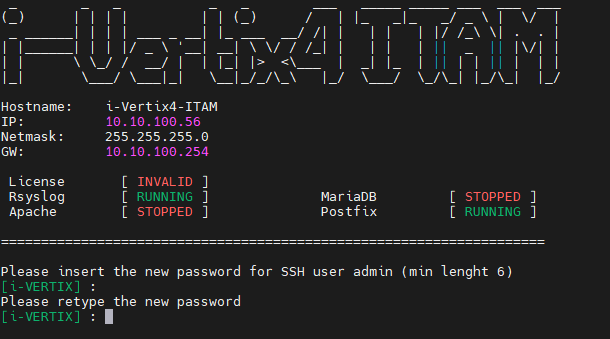
Password change
In order to modify the password:
- Select option
9) set i-Vertix system passwords - Type the new password (min. 6 characters) for SSH user admin and press Enter
- Confirm the password and press enter.
Network setup
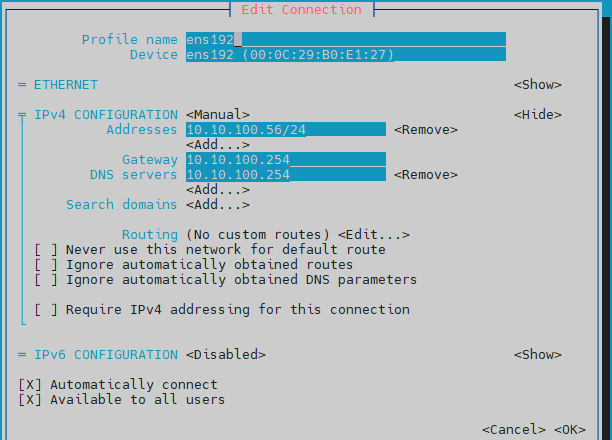
Before proceeding to modify the network, be sure to operate from the hypervisor console to avoid loss of connectivity.
- Select option
5) Network settingsfrom the menu - Select Edit Connection
- Select the proper NIC (for example ens192) and then Modify followed by your network settings:
- IPv4 Configuration: Manual
- Addresses: IP address you want to assign to the VM
- Gateway: your default gateway IP address
- DNS server: your DNS Server IP Address
- Search domain: Insert the domain (if necessary)
- IPv6 Configuration: Ignore
Confirm the settings with OK
Get back to main menu NMTUI (on the left-hand side)
- To activate the new settings, select Activate a connection from the NMTUI menu
- Select the NIC (ens192 by default), then
- Deactivate
- Activate
- Finally select Back
Get back to the main NMTUI menu
- Select Set a system hostname to configure the system hostname then select OK
- Select Quit to quit the NMTUI menu and get back to the i-Vertix menu

Now the network configuration is complete.
Restart the system if necessary selecting 2) Reboot i-Vertix in the menu.
Afterwards the system should be accessible via a network connection (for example using Putty).
Before moving on, please ensure that the DNS is working
nslookup www.google.com
You should see following or a similar result:
nslookup www.google.com
Server:         192.168.25.2
Address:        192.168.25.2#53

Non-authoritative answer:
Name:   www.google.com
Address: 142.251.209.4
Name:   www.google.com
Address: 2a00:1450:4002:402::2004
NTP settings (optional)
Choose option 4) i-Vertix Settings in the menu.

The displayed options will be:
-
1) NTP time settings, to configure the NTP servers -
2) change timezone, to change the default timezone (Europe/Rome)
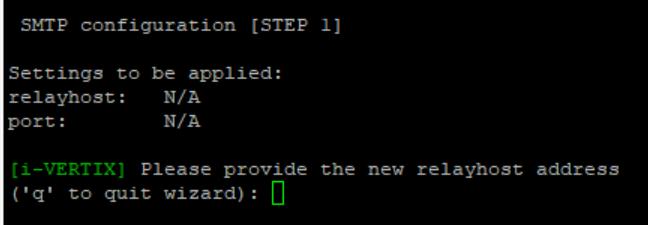
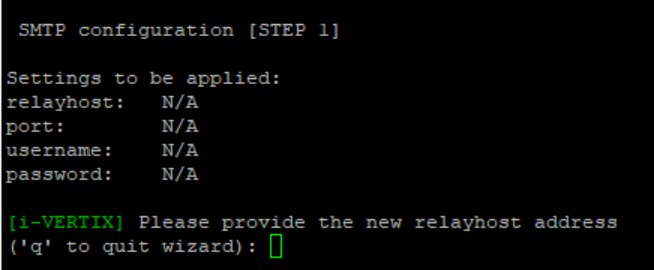
SMTP Configuration (optional)
Select option 6) SMTP settings (e-mail)
A new menu shows up which displays what the current relay host configurations are:

Select the proper SMTP option among the proposed ones

Available options
- normal SMTP
- SMTP with authentication
- SMTP with authentication and TLS
SMTP for Office365 or Amazon AWS SES
Configuration steps for SMTP
Compile every voice the menu steps indicate for each SMTP option you choose.
Once the proper option has been selected and configured, quit the smtp wizard by typing q
If you want to test the configuration you've just made, simply type T in the menu.

Provide a real e-mail sender and receiver for the test